Monday, August 31, 2015

August Garden Update!

Last month I mentioned I purchased new Coconut Liners
and was hoping to get new flowers to plant soon.
Well just a week or so after I published that post,
I made a trip to Home Depot for some new flowers!

The Home Depot flower (and herb) haul!!!

And all the new liners just waiting for new flowers to be planted!

I normally do a few different varieties of flowers...

But this time I went with just petunias in many different colors!

And I also replaced the liners/plants in my hanging baskets too!

I'm loving those lil purple flowers!

The marigolds I planted a few weeks ago are blooming like crazy!
And the gardenia plant is still going strong too.

This jalapeno plant continues to surprise me!
Keep the blooms and peppers coming please!

The basil plant I had was needing replaced,
so I brought this lil sucker home and it's already thriving!

And I know I say this every month now, but look at the Christmas Tree!
It's now HUGE and I can't wait to decorate it in December!

Slowly but surely, the lemon tree is filling out again.
And that one branch just keeps getting taller and taller.
I just picked FOUR lemons off the tree last week too.

And lastly is this amazing cactus!
I don't know if I've ever shared it,
but I've had it for years and it's HUGE too!!

As a reminder -
I will be blogging about garden updates 
every last day of each month.

It may not be a complete update each month,
but it will be about something in the garden.

So keep coming back to see what I have growing!

Sunday, August 30, 2015

Pulled Pork Quesadillas

Back in March, I ran across this recipe.
A Pulled Pork Quesadilla?
And with pickles inside?!?

I'd never heard of such a thing, 
or even thought about it,
but man it sounded good!!!

I was quite intrigued,
so I made a mental note to give it a try,
and not too long after I did just so!

Wow you guys - it was really good!
So good that I thought about it many times the next day,
and even made it for dinner for a second night in a row!!!

Not only are they really tasty,
but they're super easy to make too.
Let me show you how!!!

First things first - make your pulled pork.
I've used many different recipes over the years,
but this time I followed this recipe and loved it!

Cook your pork in the crock pot,
and then shred it using two forks.

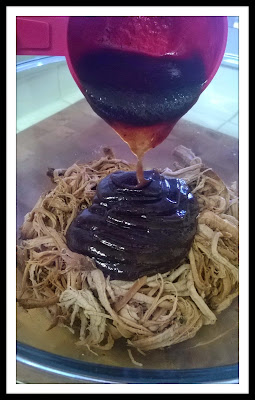
Add your favorite BBQ sauce...

And mix it up with the pulled pork.

Now that the pork is done, it's time for quesadillas!!!!

The Goods:
Flour Tortillas
Cheddar Cheese
Pickles
Red Onion
BBQ Sauce

Get all your goods prepped:
Shred your cheese.
Dice your onion.
Chop your pickles.

Now the fun part - assembling the quesadilla!

I started with one tortilla
and a nice layer of cheese.
Then I added pulled pork,
threw on diced red onion, 
then lots of chopped pickles
and finally another layer of cheese!!!

Heat your grill pan over medium-high heat
and then spray it with oil cooking spray.

Carefully place your assembled quesadilla on the grill pan,
then top it with a second tortilla to complete your quesadilla.

Keep an eye on the quesadilla while it's cooking
and once it has nice grill marks, flip that baby over!

Continue cooking until the cheese is melted
and both sides have a nice color from the grill pan.

Let rest a minute and then slice for serving.

Now dig in and enjoy your yummy quesadilla!!!

I personally have only tried the pulled pork version,
but this could also be modified to use whatever meat you like.
My mouth is watering just thinking of the possibilities!

Pulled Pork Quesadillas
1 Pack Flour Tortillas
Cheddar Cheese, shredded
1 Red Onion, diced
Pickles, chopped
BBQ Sauce

  1. Make your Pulled Pork.
  2. Shred your cheese, dice your red onion and chop your pickles.
  3. Assemble your quesadilla as follows: tortilla, cheese, pulled pork, onion, pickles, more cheese and finally a second tortilla.
  4. Carefully place assembled quesadilla on preheated and sprayed grill pan.
  5. Once cheese begins to melt and bottom tortilla has grill marks, flip the entire quesadilla over.
  6. Continue to cook until cheese is melted and both sides have a nice color from the grill.
  7. Remove from grill, let sit a minute or two and then slice to serve.

Friday, August 28, 2015

Favorite Ways to Wrap Up Summer!

TGIF you guys!!!
I'm back today for another Friday Link Up!
And again, I'm linking up with THREE different groups.
Make sure to check them all out at the bottom of this post!

I feel like I JUST posted about Summer Musts,
but that was already a few months ago!
And with the Summer almost over, it's time to talk about
FAVORITE WAYS TO WRAP UP SUMMER!!!

We still have a month or so of hot temps in Los Angeles,
but I know that it will be Fall before I know it.
So today I have just a few suggestions
on ways to capture the last essence of Summer! 

Grilling Outside
Get in some grilling while the weather is still nice and warm.
Burgers, chicken, tacos and much more!!!
Turkey Burgers
Lemon Pepper Chicken
Blackened Tilapia Tacos

Movies in the Park
If you're local to Los Angeles, there are three fun options!
I've only been to Cinespia, but I hear great things about all three.

Outdoor Games
Get some friends together for some outdoor games.
Take advantage of the sun being out late
because soon it will be sundown around 5PM!

Summer Color Mani/Pedi 
I don't know about you, but I tend to think bright colors for Summer.
Get your last fun, bright mani/pedi before dark Fall colors are all over!
Essie Fashion Playground
Essie Watermelon
DND Gel Pinky Kinky

Back To School Shopping
(Options in high and low price points!)
I'm not in school (and haven't been for years) but I love Back to School time!
New clothes, a new planner and a new bag were always a must for me.
Paige Verdugo Jeans
Erin Condren Life Planner
Tumi Nora Tote

Target Jeggings
Target Planner
Target Tote

Now for more Friday Link Up Fun, check out the blogs below!

Andrea and Erika's blogs from Friday Favorites.

April's blog from 5 on Friday.


Karli and Amy's blogs from oh hey friday!


Tuesday, August 25, 2015

Things I'm Lovin' Tuesday: Coconut Milk!

Last month I started another monthly blog series called
THINGS I'M LOVIN' TUESDAY!!!
If you missed the first post, you can fine it here,
and make sure to check back every last Tuesday of the month!

Now onto what I'm lovin' this month...

I'm a BIG fan of coconut and pretty much like anything with it,
but for some reason had never thought to try coconut milk.
That is until a few months ago when a coworker suggested it.
And after trying it in my iced coffee I was hooked!!!

I'm sure there are other brands, but I'm loving the Silk brand.

And since I am used to just skim milk in my coffee,
I went with the unsweetened version.

I tend to fill my glass about half full with coconut milk...

Then fill it the rest of the way with coffee and mix it together.

And if the weather is nice enough, I get to enjoy it outside on the balcony!

I have yet to try the coconut milk alone,
or with anything besides coffee in fact,
but I'm really excited to explore the possibilities!

What's YOUR favorite way to use coconut milk???

Wednesday, August 19, 2015

Bubble Bath Review: Dead Sea Essentials

This is a non-sponsored review and I purchased my own Bubble Bath.

Happy Hump Day!
The week is already half over.
YAY!!!!
I know that I'm excited.

Hope the rest of your week flies by!
Maybe taking a bubble bath will help.
And lucky you, I have a NEW bubble bath review today!

If you've missed past month's reviews,
you can read them herehereherehere and here.

Now let's get to the fun part,
and why you're really here -
the bubble bath review!!!

While shopping at Nordstrom Rack recently,
I found a 3-pack of bubble bath that intrigued me.
And since I am doing these fun reviews, of course I bought it!

After purchasing it at Nordstrom Rack,
I saw that it's sold a few other places as well.
They carry it at Target, Walgreens and Drugstore.com too!
(If purchasing online - make sure to use Ebates to get cash back!!!)


The 3-Pack that I purchased came with three amazing scents:

I decided to try the Hydrating Hibiscus scent first.

As with MOST of the past one's that I've reviewed,
this month's bubble bath is a no-brainer!

Simply pour the bubble bath under running water.
The directions said to use One Ounce,
but I'm a rebel and used half the bottle!

Sorry I'm not sorry, but I love me lots of bubbles!

This time I went without an adult beverage and magazine.
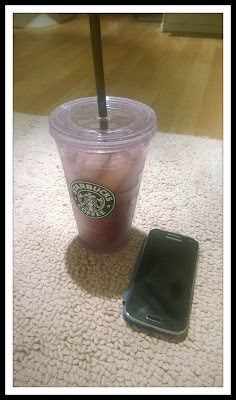
Instead, I opted for a refreshing ginger peach black iced tea
and chanced dropping my phone in the tub to read the news!


Friday, August 14, 2015

Bacon and Leek Quiche

Breakfast for dinner is one of my favorites!
I remember loving having it as a kid
and I still do today as an adult!

Because of that, I recently made quiche for dinner!
Quiche is amazing any time of the day,
but I love to have it in the evening with a nice fresh salad.

Yum! I'm getting hungry just thinking about this.
And I may just have to make it again soon!
Until then - let me show you how it's made.

The Goods:
Eggs
Bacon
Leek
Colby Jack Cheese
Pie Crust
Milk
Butter
Salt
Pepper

Dice up your bacon and cook it in a skillet.

Drain a little of the bacon fat from the skillet,
then add your chopped leek and saute.

You can either make your own pie crust,
or be like me and buy the pre-made kind.
Either way - make sure you have pie crust!

Crack 6 eggs, plus 2 more egg whites into a mixing bowl.
Add about a cup of milk and some salt and pepper.

Then mix it up with a fork .

Add your bacon, sauteed leeks and half of your cheese.

And here's where I confess to my blogger fail.
I completely forgot to take a picture of the quiche before baking.
I'm sorry...forgive me?

Anyway - bake your quiche at 375 degrees until fully cooked.
For me that was about 40 minutes, but my oven seems to be extra hot!

Take your quiche out of the oven...

And add the rest of your cheese.
Return the quiche to the oven for a minute or two,
just enough time for the cheese to fully melt!

Remove from the oven and let sit for about 5 minutes before cutting.

Now time to dig in and enjoy with a fresh salad as I previously mentioned!

Bacon and Leek Quiche Recipe
1 Leek
6 Slices Bacon
6 Eggs + 2 Egg Whites
1 Cup Milk
1 Cup Colby Jack Cheese
Pie Crust
Salt
Pepper

  1. Dice your bacon and cook it in a skillet, then set aside.
  2. Clean, slice and saute your leek, then set aside as well. 
  3. Crack eggs into large mixing bowl, then add milk, salt and pepper. Mix with a fork.
  4. Add the bacon, leek and half your cheese to the mixing bowl. Mix with a fork again. 
  5. Bake at 375 degrees for about 40 minutes (may be longer in your oven) until fully set.
  6. Remove from oven, add the remaining cheese and return to the oven for a few minutes - just until cheese melts.
  7. Let sit for about 5 minutes before cutting.