Showing posts with label Kiwi. Show all posts

Friday, July 15, 2016

How To: Homemade Green Juice Take 2!

In March I showed you how to make green juice with just a blender,
but since then I've acquired a pretty awesome juicer,
so today I'm going to show you how I make green juice with that!

While this method is a quicker process for making juice,
you don't really have the option of keeping the fiber in.
And you probably don't want to eat the pulp - but could compost it.

Now let's get to the juice making...

The Goods:
Kale
Spinach
Romaine
Apples
Lemons
Limes
Kiwi
Ginger

Get all your ingredients prepped before to make the process quicker.

My awesome Breville Juice Fountain set up and ready to go!

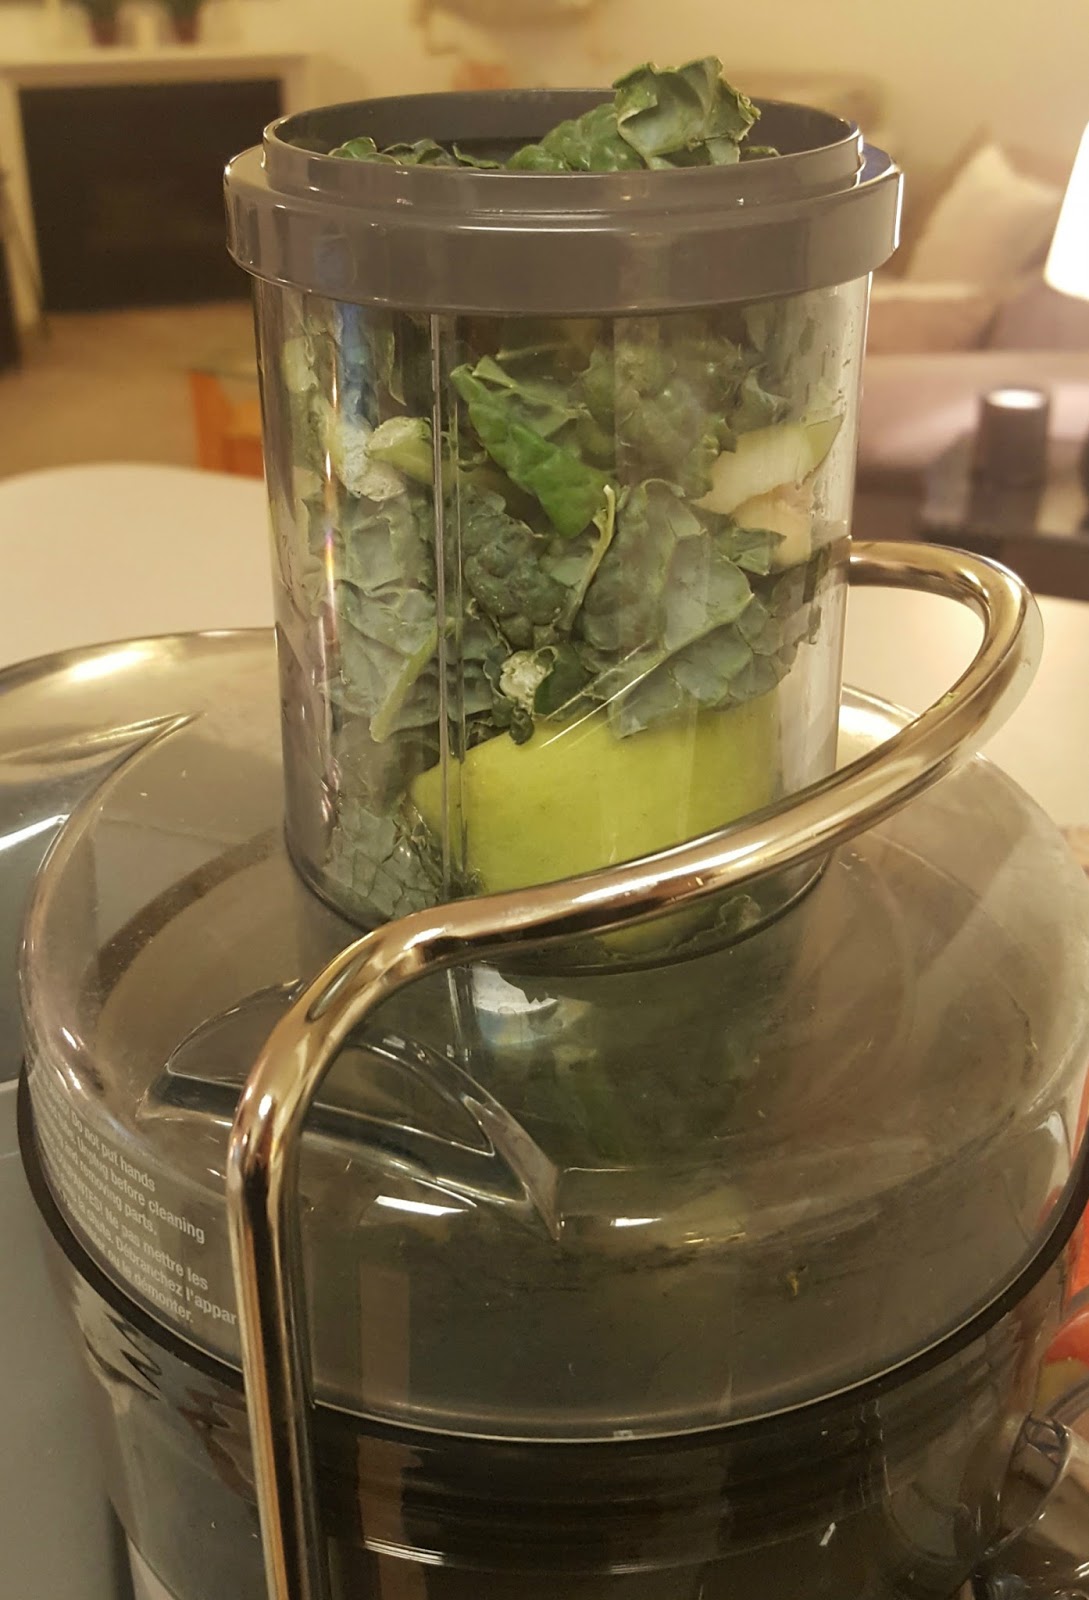
If you want to get the most out of your greens,
you have to layer your fruit and greens alternatively.

Once filled to the top, press down with the food pusher...

And watch your juice fill up the pitcher!

Keep filling up and juice the fruit...


Until your pitcher is full
(or all your fruit is juiced).

Mmmmmmmmmmmm foamy, delicious green juice!

Pour into a glass, add a cute paper straw and enjoy!!!

This post contains affiliate links meaning I may get a paid for certain purchases.

Thursday, March 10, 2016

How To: Homemade Green Juice

I'm a BIG fan of green juices,
but I'm not a fan of paying 7+ dollars for one.
Yes, I do so from time to time because it's easy,
but it's just as easy to make one at home if you plan ahead!

And since it's so easy, I figured I'd show you how to do it yourself today!

I've used both a blender and a juicer to make green juice,
but today I'm showing you how to use your blender.
You can use whatever fruits and vegetables you'd like,
but below is one of my FAVORITE green juices to date!

The Goods:
Kale
Romaine
Parsley
Green Apple
Pear
Kiwi
Ginger
Orange
Lemon
Lime

Squeeze your citrus juices, then add all the other ingredients to the blender.
I use the liquefy setting on my blender, because I want it as smooth as possible.
You can add a little water or some ice to thin it out if needed.

Once blended, you can either drink as is and get a TON of fiber...

Or you can use a fine mesh strainer to separate the liquid from the pulp.

I just use a rubber spatula to help push the juices through.

And you're left with a delicious and refreshing glass of green juice!

And of course a TON of fiber that you can toss or use in a compost!

That's it folks!
Super easy.
Super yummy.
Super good for ya!

Wednesday, September 5, 2012

Fruit Puree Pops

I'm always looking out for new recipes to try, and when I ran across this recipe last week, I wanted to be eating one IMMEDIATELY! Since that wasn't a possibility, I decided I would make them over the weekend and that's exactly what I did!


I've recently started buying mostly organic fruits and vegetables - I've even gone to a second store to get organic apples because the one I was originally shopping at, hadn't received their shipment that week! Crazy, right?!?! Anyway...since these were pretty much ALL FRUIT, I decided that organic was absolutely the way to go.  And instead of using raspberries, I used strawberries because I'm a rebel like that.

These pops are super easy to make, but take patience because they require some wait time between each layer. It's worth it though, so be patient and you'll be happy with the outcome!

Now let me show you how to make them!

The Goods:
Mangos
Strawberries
Kiwis
Popsicle Sticks

Not Pictured, but you'll also need: 
Tiny Plastic Cups, Water and Sugar 
Sorry...don't know what's wrong with me!!!

Cut up the fruit...


Using a blender or food processor, 
puree each fruit separately.


Mmmmm pureed fruit.

Now - also not pictured... mix in the simple syrup.

Portion out the kiwi puree. 

I thought using a muffin tin for each cup would make taking 
them in and out of the freezer easier and less messy.

And it was! I didn't spill any!!! 

After waiting an hour, add the mango layer.

Note: One cup is without mango because I have a friend that cannot eat pitted fruit due to a food allergy and I knew they'd be sad if they couldn't try these pops. If that's the case with you, just pick another fruit, or go with only two layers like I did! 

After twenty more minutes in the freezer, 
add the popsicle sticks and freeze for two more hours!

FINALLY add the strawberry layer and freeze overnight.
Overnight?!?! Yes...it was SOOOO hard to wait, but remember...
PATIENCE! :)

And THAT is why you need to wait.
You'll end up with a lovely layered fruit puree pop!

As you've probably noticed, I doubled the recipe because I wanted more than four pops!!!

And I'm sure glad I did!

I'm off to go eat one now. 

Go make some yourself and enjoy!!!


Sunday, May 20, 2012

Fresh Fruit Salad

I love when the warmer temperatures start to be a regular thing because that means yummy fresh seasonal fruit is or will soon be available.

I love all the seasonal pitted fruits - plums, peaches, nectarines, apricots, and cherries. I love the juicy citrus in Spring - honey tangerines and HUGE navel oranges. And of course - I love ALL the fresh melon - watermelon, cantaloupe, honeydew to name a few.

I loveeee fruit in general, but I love it even more this time of year. And one of my FAVORITE ways to eat it, is to make a giant fruit salad with everything chopped pretty small. It so good and can be stored to eat easily for a day or so.

The recipe is all up to you, and can be modified however you like. Take a look at one I made recently.

Grab a BIG bowl...

Throw in some Fresh Pineapple

And some Kiwi

And some Mango too!


Now a bunch of Strawberries

And how about some Honey Tangerine too?

Mix it all up...

and ENJOY!