Tuesday, June 30, 2015

June Garden Update

A month ago when I posted my May Garden Update,
I mentioned that I was having problems with my lemon tree.
Something was eating the leaves and I didn't know what!

Just days after posting the May Garden Update, 
I figured it out when I spotted a green little culprit!
I now knew what was eating the darn leaves!!!

See that lil sucker???
No wonder I couldn't find him for a long time!
He just blended right in with the leaves!

I'm not normally squeamish about bugs,
but this time I was for some reason!
I was scared it'd jump or fly at me and I'd freak out.

So I tried to use tongs and scissors to remove the leaf it was on,
with the hopes that I'd just remove the lil sucker from my tree.
I tried, more than once, but sadly I failed.

Shortly after, I recruited a neighbor kid to help me out.
He's in elementary school and bugs are no big deal to him.
He wasn't hesitant at all and went to work helping me.

He tried to pull the leaf the bug was on off of the tree.
The bug wasn't having it and just moved to another leaf!
So he tried cutting the leaf off and the bug moved again!!!

I was frustrated and just wanted the darn bug gone.
So when the neighbor kid asked "Can I just cut it in half?",
you can bet that I quickly replied with "YES!"

Two halves of the bug that was destroying my lemon tree!
A little gross, but both halves kept moving for a few minutes.
I'm not usually one to flat out kill bugs, but this one just had to go.

About a week after finding and getting ride of the leaf eater,
I decided that I needed to give a little TLC to my lemon tree.
It just didn't look happy with all the munched on leaves. 

So what'd I do?
Grabbed my pruners and went to town.
All the leaves that were affected would get pruned.
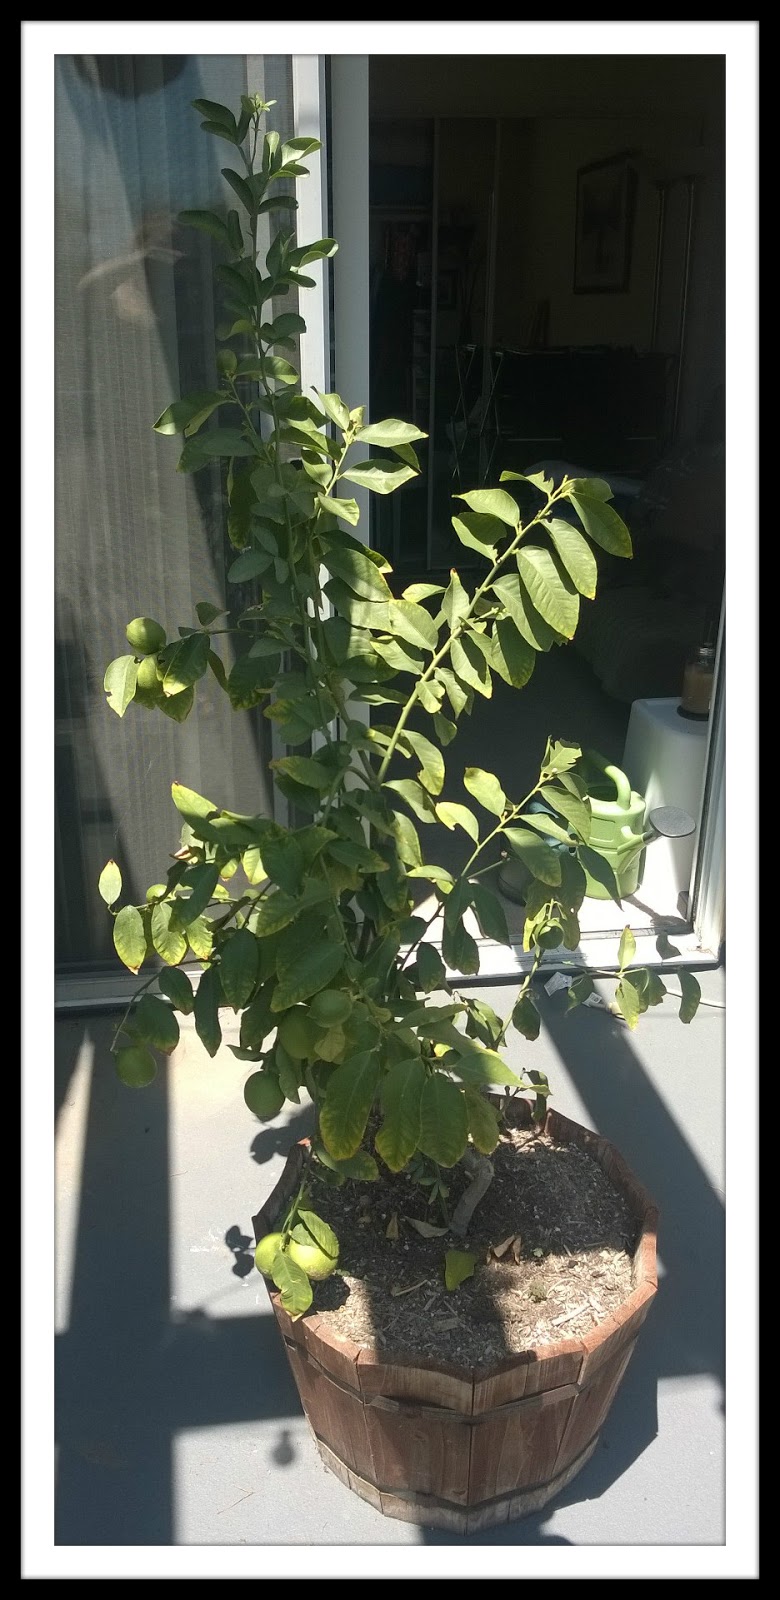
BEFORE PRUNING!
It looks okay from afar,
but close up you can see the damage!

AFTER PRUNING!
I'm aware it currently looks like a sad Charlie Brown tree.
But I'm hoping it starts to fill out again soon!

Shortly after I did all the pruning,
I noticed a few new buds appearing.
I hadn't seen new buds or blossoms in weeks!!!

While the lemon tree was needing some help,
that wasn't the case for my GIANT Christmas Tree.
This thing is huge and only keeps getting bigger!

Can you believe this was once less than a foot tall???
I recently moved it to a more shaded area of my balcony,
and I think it's actually doing even better than before.

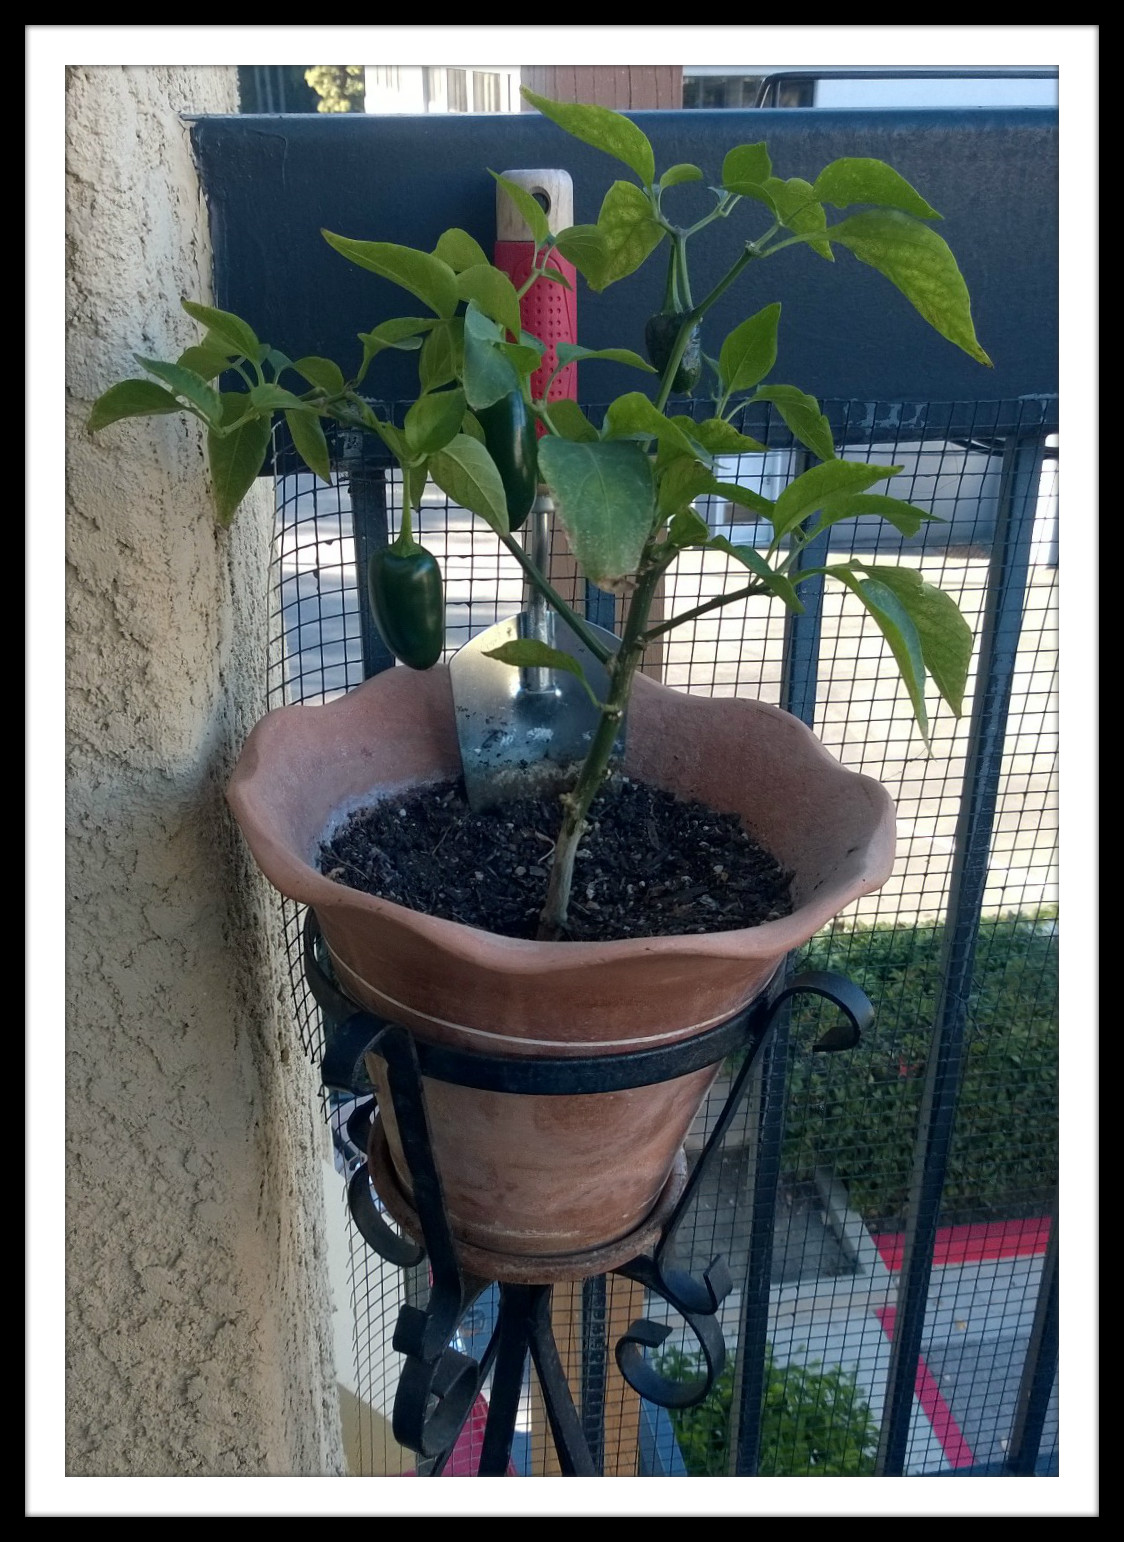
While the jalapeno plant is still doing well,
it's not thriving like it was last month.
I keep hoping to see new buds, but I haven't recently.

As a reminder -
I will be blogging about garden updates 
every last day of each month.

It may not be a complete update each month,
but it will be about something in the garden.

So keep coming back to see what I have growing!

Sunday, June 28, 2015

Homemade Chicken Enchiladas - Two Ways!

I've made Chicken Enchiladas countless times,
but until recently I'd only used red sauce.
And when prepping to make this batch,
I realized I've never blogged about making them.

So today is your lucky day folks!
Not only do you get to see how they're made,
but you get to see how you can make them 
with two different types of enchilada sauce!

These Chicken Enchiladas are yummy,
pretty simple to make too,
and can be even made ahead of time.
Keep reading to see how they're made!

The Goods:
Chicken Breasts
Corn Tortillas
Yellow Onion
Garlic
Taco Seasoning
Cheese
Red Enchilada Sauce
Green Enchilada Sauce
Olive Oil (Not pictured - oops!)

Season your chicken with taco seasoning and a little olive oil.
I use a homemade mix, but use whatever you'd like.
Roast your chicken in the oven until fully cooked.

Once the chicken has cooled enough to touch,
start shredding it using two forks.

Now it's time to saute your onion and garlic in a little olive oil.
Once they're nice and fragrant remove from the heat...

And add to the bowl of shredded chicken.
Toss everything together so it's evenly mixed.

It's almost time to assemble and roll your enchiladas!

Get your pan(s) prepped - spray with PAM and then add a thin layer of sauce.
Since I was doing two kinds, I had one with red and the other with green.

Lay corn tortilla on a flat surface and add filling to your liking.
You'll want enough filling so your enchilada is hearty, 
but not too much so you can't roll the tortilla.

Roll the tortilla up and place it seem side down into the sauce.

Keep rolling until your pan(s) are full and you've used all the filling.
Then cover with more sauce (the same kind you used on the bottom).

If you're baking the enchiladas right away, top with shredded cheese.
Use whatever your little heart (and taste buds) desires,
but I tend to use cheddar with red sauce and jack cheese with green sauce.

Bake at 350 degrees for about 15 minutes - until cheese is melted.
Now all that's left to do is dig in and ENJOY!
(But don't burn your mouth with hot cheese!!!)

If you're not baking them right away,
leave the cheese off and add when it's time to bake.

Freeze in baking dish(es) that are tightly sealed in zipper bags.

Chicken Enchiladas
1 pound chicken breasts
16 corn tortillas
1 medium yellow onion - diced
2 cloves garlic - minced
1 tablespoons olive oil, divided
1 to 1 1/2 tablespoons taco seasoning
1 cup shredded cheese (1/2 cup cheddar, 1/2 cup jack)
1 10-ounce can red enchilada sauce
1 10-ounce can green enchilada sauce

  1. Season your chicken with the taco seasoning and 1 tablespoon of olive oil.
  2. Roast at 350 degrees for about 40 minutes - until fully cooked.
  3. Let chicken cool and then start shredding with two forks. 
  4. Saute your onions and garlic with the remaining table spoon of olive oil. 
  5. Once fragrant, remove from heat and add to shredded chicken. Toss to combine.
  6. Spray your pan(s) with pan and put a thin layer of enchilada sauce on the bottom.
  7. Microwave your tortillas for about 30 seconds to make them easier to roll.
  8. Add about 1/4 cup of filling to each tortilla and roll up to form enchilada. 
  9. Place rolled enchiladas in pan, continuing until each pan is filled. 
  10. Top with remaining enchilada sauce.
  11. If freezing to bake later (in the next few months at most!), leave the cheese off and add when ready to bake. Freeze in baking dish(es) that are tightly sealed in zipper bags. Then add cheese before ready to bake. 
  12. If baking the enchiladas right away, add shredded cheese and bake at 350 degrees for about 15 minutes - until cheese is melted.


Friday, June 26, 2015

Summer Musts!

Happy Friday Everyone!!
I'm back today for another Friday Link Up!
And again, I'm linking up with THREE different groups.
Make sure to check them all out at the bottom of this post!

I'm so excited guys - Summer officially started less than a week ago!
I bet we're all ready for the longer days and warmer weather.
And since this is just the beginning of the season, now is a great time to share
FIVE SUMMER MUSTS!!!

SUNSCREEN
Sunscreen is SO important and that's why it's #1 on my list!
Being a redhead, I've burnt more times than I can remember.
And sadly have had a couple skin cancer scares too.
Make sure you're getting annual (or biannual in my case) skin checks folks.

Now I don't leave home without SPF on - even if it's not sunny!
Not only is it important to apply both face and body SPF,
but it's equally as important to reapply as needed.

HYDRATE
Summer months are HOT and easy to get dehydrated. 
Whatever you're doing these next few months,
if it's outside or not,
making sure that you stay hydrate is really important.

Drinking water is key, but I know a lot of people find it "boring".
So why not try hydrating with some yummy watermelon
or even make yourself a batch of watermelon juice???

COOL OFF
I grew up in Arizona, so I know a thing or two about staying cool in the Summer.
Growing up, I was such a little fish.
If there was a pool nearby, I was in it!
And could swim ALL.DAY.LONG.

Heading to the beach is one of my favorite ways to cool down.
Even if you don't go in the water all the way (or at all),
chances are the temps will be cooler and there will be a cool ocean breeze.

I haven't hit a water park in YEARS,
but I remember full days spent at them in my younger days.
Ahhh to be young and carefree again. 

SUMMER VACATION
With school out for a few months, Summer is a great time to take a trip!
Hit the road with some friends for a fun road trip.
Get a group together and go on a camping adventure.
Or hop on a plane and go somewhere exotic!!!

SUMMER READS
I'm not sure why - but I always seem to read more in the Summer months.
I have the two books shown above waiting to be read.
And I always have some kind of magazine handy.
And both are great to take to the pool or beach!

Now for more Friday Link Up Fun, check out the blogs below!

Andrea and Erika's blogs from Friday Favorites.

April's blog from 5 on Friday.

Karli and Amy's blogs from oh hey friday!


Wednesday, June 17, 2015

Bubble Bath Review: Bath & Body Works Aromatherapy Foam Bath

 This is a non-sponsored review and I purchased (or received as a gift) my own Foam Bath.

I've been doing bubble bath reviews the last few months.
You can read past reviews here, here and here!

As I mentioned last month -
If you have any bubble baths you love,
I'd love your suggestions so send 'em my way!!!

I've been a fan of Bath & Body Works since I was a teen.
In college I was introduced to their Aromatherapy line by a friend.
And that is when I fell in love with their Eucalyptus Spearmint scent!

I had previously used the Stress Relief lotion and pillow mist.
And the candle in that scent is pretty amazing too!
I had yet to try their Body Wash and Foam Bath.

But I got smart and asked for some last Christmas!
And guess what you guys???
I soon received not one, but two different ones to try!


There are MANY different Body Wash & Bath Foam options,
and the two that I received were:
Eucalyptus Spearmint and Lavender Vanilla.

Since I love the Eucalyptus Spearmint scent,
that's the one I picked to try first!

And just like last month's bubble bath,
this one is pretty much another no-brainer!

Simply squeeze out the bubble bath under running water.

And keeeeeeeeeep squeezing to get lots of bubbles!

Then lay back, relax and enjoy reading your book!

So are you wondering what I thought???

Well I liked it a lot!
The bubbles were really great,
but it didn't "wow" me like I was hoping.
Since I do love the scent so much though,
chances are I'll be using it again in the future!


Saturday, June 13, 2015

Red Velvet Crinkle Cookies

I first made these cookies years ago.
Like probably close to 10 years ago if I'm being honest.
And I totally forgot about them and their deliciousness.


That is until a really good friend's grandma reminded me recently!
I instantly knew I need to make them again 
and of course I had to blog about them too!!

So today, I bring you a very easy and super tasty cookie
that funny enough is made using cake mix!
Let me show you exactly how these babies are made.

The Goods:
Red Velvet Cake Mix
Cream Cheese
Egg
Vanilla
Butter
Powdered Sugar

Let butter and cream cheese get soft in a large mixing bowl.

Then cream using a hand mixer.

Add the egg...

And mix that in!

Now add the vanilla...

And mix that in too...

Until it looks like this!

Dump in the whole box of cake mix...

And mix that in!

Oh hello yummy red velvet cream cheese mixture.

Form into walnut sized balls.

And roll each ball in powdered sugar.

Place on a cookie sheet with room for cookie to expand during baking.

Bake at _____ for ________.

Cool on baking sheet for a minute or two.

Remove to wire rack and dust with more powdered sugar.

And of course, take a bite to make sure they taste alright!


Red Velvet Crinkle Cookies Recipe

1 Box Red Velvet Cake Mix
1 8oz. Block Cream Cheese - Room Temp
1/2 Cup Butter - Room Temp
1 Egg
1 Tablespoon Vanilla
Powdered Sugar 

  1. In a large mixing bowl, cream the butter and cream cheese.
  2. Beat in the egg and vanilla until combined.
  3. Add cake mix and mix until fully incorporated.
  4. Cover and refrigerate for at least two hours.
  5. Preheat oven to 350 degrees.
  6. Roll chilled batter into tablespoon sized balls.
  7. Roll balls in powdered sugar and place about two inches apart on a baking sheet.
  8. Bake for 10 to 12 minutes.
  9. Cool completely on a wire rack and then dust with more powdered sugar.