Sunday, October 30, 2016

Butter Chicken

I love eating Indian food - going out for it or getting it to go.
Heck - even the frozen Indian food from Trader Joe's is tasty.
So when I saw this Buzzfeed and how simple it looked,
I knew I needed to try to make it myself!
And that is exactly what I did and I'm here to show you.

Sorry - no "The Goods" picture this time
 because I decided to blog about this at the last minute.

Marinate 2 pounds of bite sized pieces of chicken breasts in 
1 teaspoon chili powder, 1/2 teaspoon turmeric, salt and pepper to your liking.
Let sit at least 15 minutes.


Melt two tablespoons of butter in saute pan and brown chicken.


Remove chicken and set aside.

Melt two more tablespoons of butter over medium heat,
then saute 1 1/2 cups diced onions, 3 cloves minced garlic,
3 teaspoons garam masala, 1 tablespoon grated fresh ginger,
1 teaspoon chili powder, 1 teaspoon cumin, 1 teaspoon cayenne,
3 inch cinnamon stick, pinch salt and pepper.

Cook until fragrant - about 8 minutes.

Add (1) 14 ounce can of tomato sauce and simmer.


Add one cup cream...

And one cup water.

Bring back to a simmer

Return the chicken to the pan and simmer covered for 10 to 15 minutes.

Stir in 2 more tablespoons butter and adjust salt and pepper to your liking.

Garnish with cilantro.

And finally serve over a bed of rice.

  1. Marinate 2 pounds of bite sized pieces of chicken breasts in 1 teaspoon chili powder, 1/2 teaspoon turmeric, salt and pepper to your liking. Let sit at least 15 minutes.
  2. Melt 2 tablespoons of butter in saute pan and brown chicken. Remove chicken and set aside.
  3. Melt 2 more tablespoons of butter over medium heat, then saute 1 1/2 cups diced onions, 3 cloves minced garlic, 3 teaspoons garam masala, 1 tablespoon grated fresh ginger, 1 teaspoon chili powder, 1 teaspoon cumin, 1 teaspoon cayenne, 3 inch cinnamon stick, pinch salt and pepper. Cook until fragrant - about 8 minutes.
  4. Add (1) 14 ounce can of tomato sauce and bring to a simmer.
  5. Add one cup cream and one cup milk, then return to a simmer.
  6. Return the chicken to the pan and simmer covered for 10 to 15 minutes.\
  7. Stir in 2 more tablespoons butter and adjust salt and pepper to your liking.
  8. Garnish with cilantro and serve over a bed of rice. 

Tuesday, October 25, 2016

Things I'm Lovin' Tuesday: Catty Wagon

In 2015 I started a monthly blog series called
THINGS I'M LOVIN' TUESDAY!!!
Come back every last Tuesday of the month for a new post.

Now onto what I'm lovin' this month...

Towards the end of Summer my boyfriend and I went to Melrose Trading Post.
I was there mainly to look, possibly buy some chairs (that didn't happen),
but as soon as we pulled in I spotted the best thing at the flea market that day -
Catty Wagon - a mobile cat adoption truck with super cute kittens!!!


I didn't adopt any kittens that day, 
but that didn't stop us from playing with them.
I mean look how cute they are - we couldn't resist!
And the employees were happy to let us get our kitten cuddles.


One of them did want to go home with me though...


He climbed in there himself and was so content!

If you're LA local and looking to adopt, make sure to check out Catty Wagon!

Wednesday, October 19, 2016

Bubble Bath Review: Burt's Bee's Baby Bee Tear Free

This is a non-sponsored review and I purchased my own Bubble Bath.

I've reviewed a few "children's" bubble bath before.
First was Mr. Bubble and then Beauty Counter.
Since I didn't love either of them,
I didn't have high hopes for this month's bubble bath.

Keep reading to see what I ended up thinking!

Say that three times fast!

Just like most bubble baths I've reviewed, 
simply pour a good amount under running water.

And of course, something to drink and reading material!

I was so surprised with the amount of bubbles this produced.
I had very low expectations and they were blown away.
I would for sure recommend this product to anyone, any age, that likes bubbles!

Wednesday, October 12, 2016

DIY: Craft Closet Makeover!

If you've read my blog for any time now,
you'll know that I'm into crafts and DIY projects,
so of course I have quite a few supplies.

Earlier this year I showed you a fun DIY project

But my craft supplies don't end there.
I have half a closet in my den full of craft "stuff"
and I was fed up with the way it was stored.

So today I'm showing you my Craft Closet Makeover.
It was pretty simple, cost around $50 and looks so much better!
I was so happy with the end result.

The Before
I'm so embarrassed how messy this looks!

Supplies I picked up at Target.

All cleaned out and ready to be made over.

The Target supplies assembled and in place.
Now time to fill it up!!!

The After!
I've added and changed a few small things since this picture,
but like I said before I am so happy with the way it turned out.
I love having everything organized and easily accessible.

Saturday, October 8, 2016

"Healthy" Cookies

I've had a pretty healthy diet for pretty much my entire life,
but over the last few months I've made small changes to my diet,
and I'd say that my eating has gotten even healthier!

But because I'm me - I still have that sweet tooth,
so of course I looked for something healthy to curb that.
I quickly found this recipe and made it that same day!

After adding a few yummy ingredients,
I ended up with a cookie that was not only pretty healthy,
but fixed that sweet craving I get quite often.

The Goods:
Mashed Bananas
Oats
Coconut Flakes
Craisins
Mini Chocolate Chips
Ground Cinnamon

Mix together 2 large mashed bananas, 1 cup oats and a teaspoon ground cinnamon.

Add 1/2 cup EACH of mini chocolate chips, craisins and coconut flakes.

Mix until everything is well incorporated. 

Portion your cookies out on greased cookie sheet.

Realize that some granulated honey would be a great addition,
so sprinkle some on top of each cookie before baking.

Bake at 350 degrees for 15 minutes.
They will be pretty soft when you take them out.

Cool on wire rack for a few minutes.

Then take a bite and enjoy this "healthy" treat!

Healthy Cookies
Adapted from The Burlap Bag

2 Large Mashed Bananas
1 Cup Oats
1/2 Cup Coconut Flakes
1/2 Cup Craisins
1/2 Cup Mini Chocolate Chips
1 Teaspoon Ground Cinnamon

  1. Mix together 2 large mashed bananas, 1 cup oats and a teaspoon ground cinnamon.
  2. Add 1/2 cup EACH of mini chocolate chips, craisins and coconut flakes.
  3. Mix until everything is well incorporated. 
  4. Portion your cookies out on greased cookie sheet.
  5. Realize that some granulated honey would be a great addition, so sprinkle some on top of each cookie before baking.
  6. Bake at 350 degrees for 15 minutes. They will be pretty soft when you take them out.
  7. Cool on wire rack for a few minutes.
  8. Then take a bite and enjoy this "healthy" treat!

Wednesday, October 5, 2016

Whiskey Wednesday: Apple Old Fashion

Happy Wednesday guys!!!
In 2015, I started a fun new blog series - 
Whiskey Wednesday!!!

If you missed them, here are past posts:
Irish Mule
 Mint Julep
Bourbon & Sparkling Lemonade
Irish Redhead
Old Fashion
Jameson Coke Floats
Bourbon Cherry Coke
Bourbon Spiked Apple Cider
Hot Toddy
Whiskey Sour
Sage Brown Derby
Strawberry Whiskey Smash
Gold Rush
Blackberry Whiskey Punch
Kickin' Blood Orange Spritzer
Cherry Lime Whiskey Fizz
Peach Mint Julep

Last month I mentioned that I've started adding different twists
 to cocktails I've already featured.
And today I'm adding my own spin on Kumi and Jeff's Old Fashioned
simply by adding a little bit of Fall - Apple Juice!

Let me show you how to make this yummy cocktail.

The Goods:
Apple Juice
Angostura Bitters
Brown Sugar
Bourbon
Orange
Apple

In cocktail glass, combine 2 ounces apple juice, dash of bitters and 1 teaspoon sugar.

Stir to dissolve the sugar and combine mixture.

Add ice cubes and 2 ounces bourbon to glass.

Garnish with orange peel, apple slice and maraschino cherry.

Take a sip and enjoy this festive fall cocktail!

Monday, October 3, 2016

Baked Donut Monday: Lavender with Blueberry Glaze

Happy Monday everyone!!!
I'm back again for another Baked Donut Monday post
and today I'm going to tell you about some super tasty
LAVENDER BAKED DONUTS 
WITH BLUEBERRY GLAZE!

One of my close friends went lavender picking in Ojai earlier this year.
She dried it out and then asked me if I wanted some to use for crafts of cooking.
I, of course, said yes and went to town looking for recipes using it.
I was ecstatic when I found a baked donut recipe using lavender.

I made it very soon after and was quite intrigued by it's taste.
I'd never had anything like it before and it got better with every bite.
I shared these donuts with some of my closest friends,
and they too agreed that it just kept getting better and better.

The Goods:
Lavender
Ground Flax Seed
Olive Oil
Maple Syrup
Vanilla Extract
Apple Cider Vinegar
Gluten Free All-Purpose Flour
Baking Soda
Salt
Powdered Sugar
Blueberries
Almond Milk

Add 1 tablespoon dried lavender to 1/2 cup warm water.

Steep for about 30 minutes.

Strain lavender tea and set aside.

Process 3 tablespoons flax seed with 1 teaspoon dried lavender until fine.

In a small bowl, combine the flax seed and lavender mixture
with the lavender tea, whisk well and set aside at least 5 minutes.
This is your "egg" in the recipe.

Combine gluten free all purpose flour, salt and baking soda. Set aside.

In a large bowl, combine flax seed "egg" mixture with olive oil, 
maple syrup, vanilla extract and apple cider vinegar and mix well.

Add in the dry ingredient and mix until just combined. 

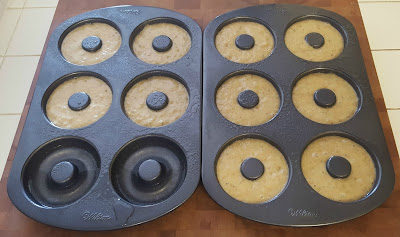
Transfer donut batter to a large zipper bag.

Cut off the end of the zipper bag 
and fill your greased donut pan until 1/2 to 3/4 full.

Bake at 325 degrees for about 10 minutes.
You can test that they're done with a toothpick.

Cool in the pan for a few minutes.

Remove from pan and finish cooling on wire rack.

While cooling, make your blueberry glaze.

In food processor, combine 1/2 cup powdered sugar, 2 tablespoons blueberries
1 teaspoon vanilla extract and 2 teaspoons almond milk. 
Pulse until smooth, adding extra almond milk if needed to reach desired consistency.

Dip to the top of each donut in the glaze and return to wire rack to set up.


Bite into the donut and enjoy the unique deliciousness!

Lavender Baked Donuts
With Blueberry Glaze
Inspired By food52

For the Donuts:
1/2 Cup Warm Water
4 Teaspoons Dried Lavender
3 Tablespoons Ground Flax Seed
1/4 Cup Olive Oil
1/3 Cup Maple Syrup
1 Teaspoon Vanilla Extract
1 Teaspoon Apple Cider Vinegar
1 Cup Gluten Free All-Purpose Flour
1/2 Teaspoon Baking Soda
1/2 Teaspoon Salt

For the Glaze:
1/2 Cup Powdered Sugar
2 Tablespoons Blueberries
1 Teaspoon Vanilla Extract
2 Teaspoons Almond Milk

  1. Add 1 tablespoon dried lavender to 1/2 cup warm water. Steep for about 30 minutes. Strain lavender tea and set aside.
  2. Process 3 tablespoons flax seed with 1 tablespoon dried lavender until fine.
  3. In a small bowl, combine the flax seed and lavender mixture with the lavender tea, whisk well and set aside at least 5 minutes. This is your "egg" in the recipe.
  4. Combine gluten free all purpose flour, salt and baking soda. Set aside.
  5. In a large bowl, combine flax seed "egg" mixture with olive oil, maple syrup, vanilla extract and apple cider vinegar and mix well.
  6. Add in the dry ingredient and mix until just combined. 
  7. Transfer donut batter to a large zipper bag.
  8. Cut off the end of the zipper bag and fill your greased donut pan until 1/2 to 3/4 full.
  9. Bake at 325 degrees for about 10 minutes.You can test that they're done with a toothpick.
  10. Cool in the pan for a few minutes. Remove from pan and finish cooling on wire rack.
  11. While cooling, make your blueberry glaze. In food processor, combine 1/2 cup powdered sugar, 2 tablespoons blueberries,1 teaspoon vanilla extract and 2 teaspoons almond milk. Pulse until smooth, adding extra almond milk if needed to reach desired consistency.
  12. Dip to the top of each donut in the glaze and return to wire rack to set up.