One of my best friends gave me Magnetic Primer and Chalkboard Paint for Christmas this past year. I didn't use it for months, and they threatened to take it back to use themselves if I didn't use it soon. So I did just that!
I had originally planned to put the Magnetic Chalkboard in the Den, but I reconsidered after realizing that the chalk dust would get ALLLLLL over my carpet and that would not be good!
After very little thought, I decided to put it in the entryway to my apartment instead. It's a much better place and will be used way more often! And the chalk dust drops onto laminate, which wipes clean easily.
The area taped off.
Starting to apply the first coat of primer!
I started the project a few weeks ago and somehow believed I would have it done in one day. After one day I realized it might be a longer process, but hoped to get it done that weekend!
HAHAHA
It's a much longer process than I thought because of all the waiting time. That and the fact I had to use 10 coats, yes TEN coats, of primer to make it magnetic enough. Don't believe the box folks - the two or three coasts they recommend is no where near strong enough to hold any type of magnet. Lies, all lies!
After applying the final coat of primer!
The next day after drying for houuuuuuuurs.
And it's magnetic!!!
After the final coat was applied, I had to wait three days before I could condition the chalkboard. In order to do that you take a piece of chalk and rub it all over the chalkboard using the side of the chalk instead of the tip. Once that's done, you remove it all with a felt cloth or felt eraser. Finally, you wipe it all down with a damp cloth and let it air dry. THENNNNNN you can use your chalkboard!
Beginning the conditioning process...
Wiped off with a felt eraser...
And finally with a damp cloth!
A close friend informed me that Endust works wonders when cleaning the chalkboard. I picked up a bottle and sure enough they were right. The Endust does WONDERS!
The painting part wasn't the end of the project though. I wanted it to look pretty so I decided I'd frame the chalkboard!
I would have had the project finished much sooner, but I worked at a very slow pace after the first weekend.
I painted and hung the moulding frame one weekend.
Frame HUNG!
Filled in the imperfect gaps on the corners the next weekend.
And finally this weekend I did the very LAST coat of touchup paint on the frame.
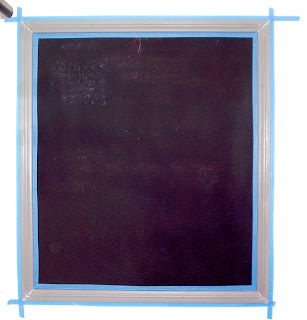
More taping - but for the last time!
Andddddd FINISHED! :)
I'm very happy with the outcome and I am glad that my friend threatened me to do it or lose it. It got me to stop putting it off and now that it's done I wish I'd done it sooner!


No comments:
Post a Comment