Showing posts with label Apples. Show all posts

Friday, July 15, 2016

How To: Homemade Green Juice Take 2!

In March I showed you how to make green juice with just a blender,
but since then I've acquired a pretty awesome juicer,
so today I'm going to show you how I make green juice with that!

While this method is a quicker process for making juice,
you don't really have the option of keeping the fiber in.
And you probably don't want to eat the pulp - but could compost it.

Now let's get to the juice making...

The Goods:
Kale
Spinach
Romaine
Apples
Lemons
Limes
Kiwi
Ginger

Get all your ingredients prepped before to make the process quicker.

My awesome Breville Juice Fountain set up and ready to go!
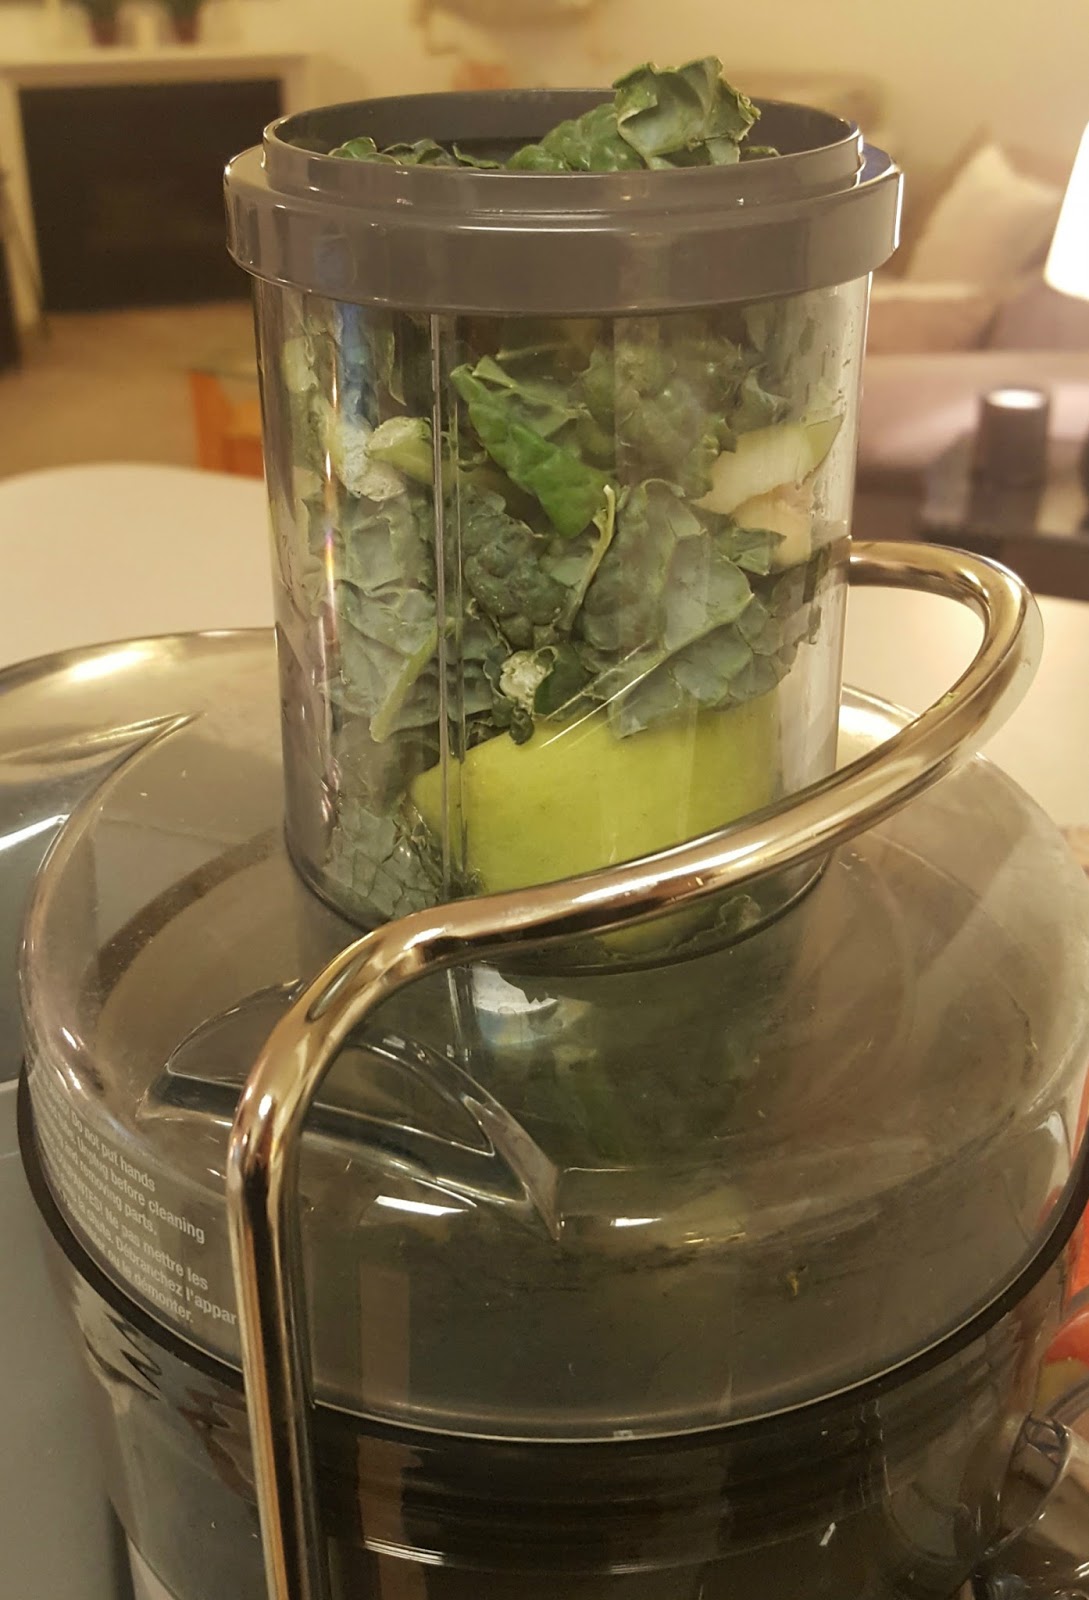
If you want to get the most out of your greens,
you have to layer your fruit and greens alternatively.

Once filled to the top, press down with the food pusher...

And watch your juice fill up the pitcher!

Keep filling up and juice the fruit...


Until your pitcher is full
(or all your fruit is juiced).

Mmmmmmmmmmmm foamy, delicious green juice!

Pour into a glass, add a cute paper straw and enjoy!!!

This post contains affiliate links meaning I may get a paid for certain purchases.

Thursday, March 10, 2016

How To: Homemade Green Juice

I'm a BIG fan of green juices,
but I'm not a fan of paying 7+ dollars for one.
Yes, I do so from time to time because it's easy,
but it's just as easy to make one at home if you plan ahead!

And since it's so easy, I figured I'd show you how to do it yourself today!

I've used both a blender and a juicer to make green juice,
but today I'm showing you how to use your blender.
You can use whatever fruits and vegetables you'd like,
but below is one of my FAVORITE green juices to date!

The Goods:
Kale
Romaine
Parsley
Green Apple
Pear
Kiwi
Ginger
Orange
Lemon
Lime

Squeeze your citrus juices, then add all the other ingredients to the blender.
I use the liquefy setting on my blender, because I want it as smooth as possible.
You can add a little water or some ice to thin it out if needed.

Once blended, you can either drink as is and get a TON of fiber...

Or you can use a fine mesh strainer to separate the liquid from the pulp.

I just use a rubber spatula to help push the juices through.

And you're left with a delicious and refreshing glass of green juice!

And of course a TON of fiber that you can toss or use in a compost!

That's it folks!
Super easy.
Super yummy.
Super good for ya!

Wednesday, December 2, 2015

Whiskey Wednesday: Bourbon Spiked Apple Cider

Happy Wednesday everyone!!!
A few months ago, I started a fun new blog series - 
Whiskey Wednesday!!!

Make sure to check back each month for a new recipe!
Whiskey Wednesday will happen every first Wednesday of the month.

While shopping at Trader Joe's recently,
I saw Sparkling Apple Cider at the check out.
A lightbulb went off in my head immediately,
and that's how this month's whiskey drink was created!

It's was quite simple to make,
tasted oh sooooooooo good,
but you could easily get yourself in trouble!!
You can hardly taste the bourbon in these babies!

Let me show to make these yummy drinks!

The Goods:
Bourbon
Sparkling Apple Cider
Sugar
Cinnamon
Apple

Get everything prepped and laid out.
Mix your cinnamon and sugar in ramekin.
Pour a tiny bit of apple cider in another ramekin.

Slightly wet the rim of the glass with the apple cider.

Then place in cinnamon sugar mix and cover glass rim.

Place one slice of apple in each glass.

Add two ounces of whiskey to each glass.

Fill with chilled sparkling apple cider
and garnish with another apple slice.

Cheers to a good night with one of your best friends.

Then take a sip, sit back and relax!!!

Wednesday, June 25, 2014

Quinoa Apple Salad

A few weeks ago, I met up with some friends for lunch and 
we went to one of the newly opened locations for Lemonade!
If you live in LA and haven't tried Lemonade yet, you're missing out.
Find one close to you and try it ASAP!

I've been to a few different Lemonade locations and have been a fan from day one.
A friend even gave me their cookbook for Christmas this year!
I have yet to make anything out of the cookbook, 
but after my most recent visit I knew I needed to try to recreate one of the dishes I had.

So what was the dish you ask?
Red Quinoa Salad with Apples, Arugula, Sunflower Seeds and Pistachios!
If you don't know already - I love love love me some quinoa salad.
(You can check out some past posts about it here, here and here!)

Just a few hours after lunch, I decided I didn't want to wait long and 
got to work searching for a copycat recipe online. 
To my surprise, it wasn't very hard and I had a recipe in no time!

Now that I'm done rambling, let me show you how easy it is to make!!!

The Goods:
Qunioa 
Water (Not Pictured)
Fuji Apples
Arugula 
Sunflower Kernels
Pistachios
Juice from an Orange
Olive Oil
Salt
Pepper


Cook your qunioa according to package directions.
Since I'm using this in a salad - I always like to cool my qunioa before adding it.
Pour/scoop the quinoa onto a chilled baking sheet and spread it out to cool.

While the qunioa is cooking, get your other goods ready!
Add the apples, pistachios and sunflower kernels to the bowl and toss to combine.
Fold in the arugula, orange juice, olive oil, salt and pepper.
That's it! Now it's time to dig in and ENJOY!!!

Hope you like this quinoa salad as much as I do!
I've already made it twice since having it at Lemonade.
Oh and don't forget - go try Lemonade if you haven't already!!!

Wednesday, January 29, 2014

Apple and Onion Pork Loin "Roast"


In this post, I told you about the AMAZING Pork Loin Roast I made on my stovetop because my oven was broken. (Note - my oven is fixed now, but it wasn't fixed the next day as I'd hoped.)

I already told you about the deliciousness, so let me show you how I made it!
Original recipe can be found here.

The Goods:
Pork Loin
Apples
Onion
Apple Juice
Chicken Stock
Olive Oil
Salt
Pepper
Bay Leaf

Heat olive oil over high heat and sear pork on all sides.
Add apple juice, broth, sliced apples, onion and bay leaf. 
Bring to a boil, reduce heat and simmer for an hour and a half or longer depending on size of pork.

 Once cooked, remove the pork, the apples and the onions.
Let the pork rest and then slice.

 Raise heat, bring the liquid to a boil and reduce until thick.
Serve over the sliced pork with apples and onions on the side!

Sunday, January 5, 2014

Sunday Night Dinner: Take 36

It's been awhile since I posted a Sunday Night dinner post.
My entire schedule has been all messed up due to the holidays, 
but I'm pretty sure it's back to normal - at least for now!

So as some of you know - my oven is broken!
It worked Friday night, but refused to preheat last night.
It should be fixed tomorrow...

But that didn't help me tonight when I wanted to make 
A ROASTED Pork Loin, ROASTED Potatoes and ROASTED Broccolini.

I was sad.
I had already gone grocery shopping and everything.
I wanted my roasted Sunday Night Dinner gosh darn it!

But I realized there was nothing I could do, so I found a different recipe instead!

I made a completely different meal than I originally planned...


I made this AMAZING Pork Roast (look for a future blog about this - it's THAT good!!), Whole Wheat Egg Noodles and Steamed Broccolini.

While this meal was not what I'd originally intended to make tonight, 
I'm SO happy that I ended up making everything I did.
And one of the best parts is that I get to enjoy this meal again as leftovers tomorrow night!!

Sunday, October 27, 2013

Homemade Applesauce!

My brother was recently talking about making A LOT of applesauce (we're talking a bushel of apples here people!!), and it got me wanting some to eat and maybe even bake with. With that fresh in my mind, I bought a two pound bag of apples yesterday and made the delicious treat just hours later. 

I knew I wanted to keep my applesauce pretty simple, so I just used apples, water and a tiny pinch of sugar. That's IT! No cinnamon, no other sweeteners, nothing! It may sound boring but it's incredibly tasty and really doesn't need anything else.

Wash, peel and dice the apples.

Add a lil water and a pinch of sugar if desired.
Bring to a boil, reduce to a simmer and cook for 25 to 30 minutes - until tender and starting to fall apart.

Transfer to a blender or food processor and puree to your liking.
Store in an airtight container in your fridge.

Homemade applesauce is amazing and I really should make some more often. 
Maybe even make bigger quantities like my brother!!

Sunday, December 4, 2011

Adventures In Pie Making: Dutch Apple Pie!

I know, I know. The month is over and I'm still posting about pies...

How could this be??!??!??

While November is over, I technically have until the 6th of December to post about pies because I didn't start Pie Month until November 6th! :)

Yayyyy!

More PIE!!!

It was always my goal not to repeat any pies during Pie Month, and I don't really consider this a repeat because it is a different type of pie, but I did use almost all of the same ingredients...

I made a Traditional Apple Pie a few weeks ago, but more recently I made a Dutch Apple Pie. Both had apples tossed with sugar and spices, but topped two completely different ways!

I got the recipe from Tasty Kitchen - a section of The Pioneer Woman.

Are you surprised?! :)

I made the pie to take to Thanksgiving in Santa Barbara for my family to enjoy! And enjoy is what they did! A 10 year old relative even gave it 100 thumbs up! What's better than that???

So let me show you how to make this amazing pie!

The Ingredients!
5 whole Apples, Cored, Peeled And Sliced
¾ cups Sugar
2 Tablespoons Flour
1 teaspoon Ground Cinnamon
1 dash Ground Nutmeg
Pinch Ground Cloves
1 whole 9" Pie Crust, Unbaked
⅓ cups Cold Butter
⅓ cups Brown Sugar
¾ cups Flour

Peel, core and slice apples. 
Toss in sugar, flour, cinnamon, nutmeg and cloves.
Arrange in pie crust.

Cover in mixture of butter, brown sugar and flour.
Bake 350 for 60 to 70 minutes.

Ta-Da!


Tuesday, November 15, 2011

Adventures In Pie Making: Traditional Apple Pie!

I've made apple pie a few times before, but it was always the Dutch Apple kind.

I decided recently that since I cheat a bit and use store bought crust, I finally HAD to give Traditional Apple Pie a shot - you know, the one with two crusts: one on bottom and one on top.  The crust was always my problem and what held me back in the past. I've always had problems when making my own pie crust, so for now I stick to the wonderful store bough refrigerated dough. I don't cheat COMPLETELY and use the frozen pie shells. 

Now that I'm done rambling, let me show you this AMZING pie!!!

The Goods:
6 Apples (I used 5 Granny Smith and 1 Pink Lady)
3/4 C Sugar
1 Teaspoon Cinnamon
Zest and Juice of 1 Lemon
Milk
Extra Sugar

Pie Crust #1

My Pie Crust Crimping Skills

Peeling The Apples!

Tossing Apples in Lemon Juice, Sugar and Cinnamon.

Mmmmm


Pouring The Apples Into The Crust

Still Pouring...

Making Touch Ups

Done!


Crust #2

Ta-Da!

Cuts Made For Steam To Escape

Before baking...
Brush the top crust with milk and sprinkle with sugar!

Bake at 400 degrees for 30-45 minutes.

Halfway Through Baking

Anddddddddddd DONE!!!!

Time To Eat.
NOMMMM NOM NOM