Showing posts with label Onions. Show all posts

Sunday, April 24, 2016

Turkey and Sweet Potato Chili

Growing up, my mom used to make a delicious chili using ground beef.
I didn't eat beef for many years, so I modified her recipe to use ground turkey instead.
I almost always have some of that kind in individual portions in my freezer,
but I was intrigued by this turkey chili recipe, so I decided to give it a try!

The Goods:
Ground Turkey
Sweet Potatoes
Onion
Tomato Sauce
Diced Tomatoes
Pinto Beans
Garlic
Chili Powder
Garlic Powder
Cumin
Salt
Pepper
Red Pepper Flakes

Peel and dice your sweet potatoes and set aside.

Brown your ground turkey and drain the grease.
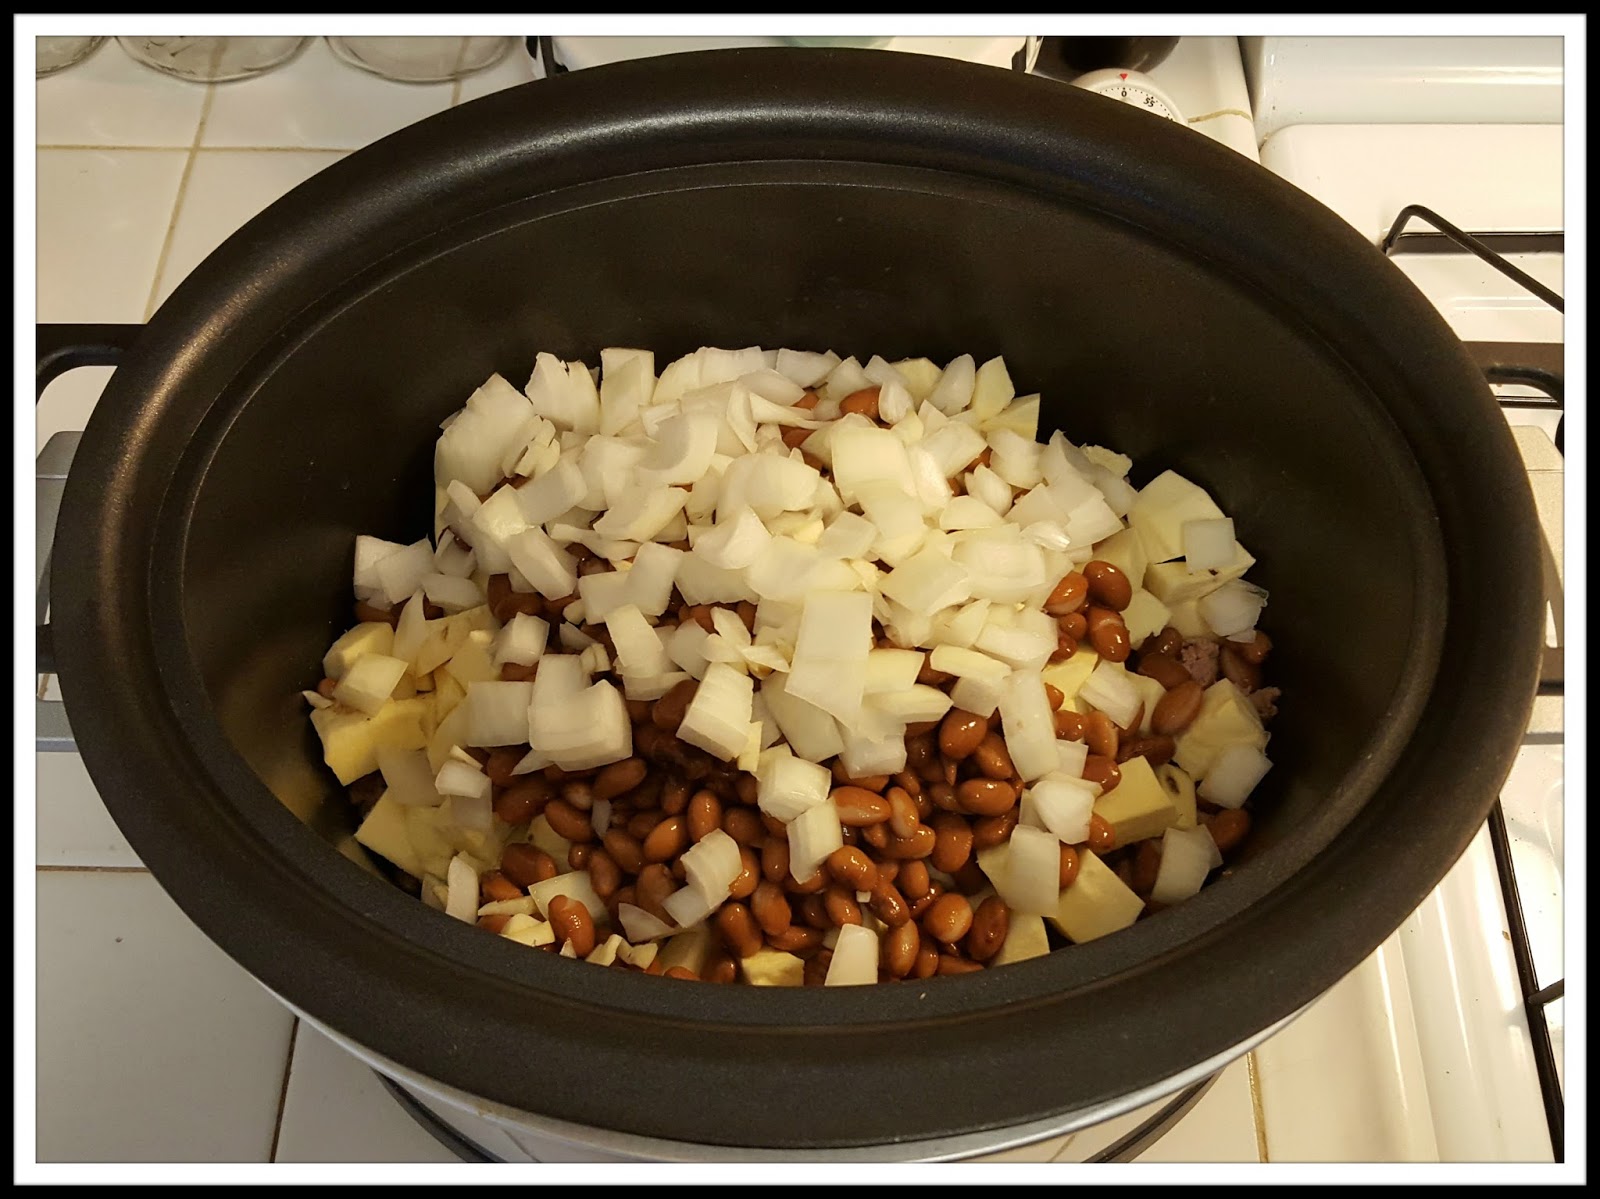
On top of the ground turkey, place sweet potatoes, pinto beans and diced onion and garlic.

Now add your tomato sauce, diced tomatoes, and spices.

Mix everything up in your slow cooker...

And cook on low for about 8 hours, 
until sweet potatoes are fully cooked and tender.

Serve yourself a bowl of this hearty chili.

Top with your desired garnishes, dig in and enjoy!!!

This chili was a hit!
I loved the addition of sweet potatoes,
so I'll absolutely be making this again! 

Turkey Sweet Potato Chili
(Adapted from I Wash You Dry)

1 Pound Ground Turkey
1 Large Sweet Potatoes, Peeled and Diced
1 Onion, Diced
1 15 Ounce Can Tomato Sauce
1 15 Ounce Can Diced Tomatoes
2 15 Ounce Cans Pinto Beans
1 Clove Garlic, Minced
1/2 Teaspoon Chili Powder
1/2 Teaspoon Garlic Powder
1/2 Teaspoon Cumin
1/2 Teaspoon Salt
1/2 Teaspoon Pepper
1/2 Teaspoon Red Pepper Flakes

  1. Brown your ground turkey and drain the grease.
  2. On top of the ground turkey, place sweet potatoes, pinto beans and diced onion and garlic.
  3. Now add your tomato sauce, diced tomatoes, and spices.
  4. Mix everything up in the slow cooker and cook on low for about 8 hours, until sweet potatoes are fully cooked and tender.
  5. Top with your favorite chili garnishes, dig in and enjoy!

Sunday, June 28, 2015

Homemade Chicken Enchiladas - Two Ways!

I've made Chicken Enchiladas countless times,
but until recently I'd only used red sauce.
And when prepping to make this batch,
I realized I've never blogged about making them.

So today is your lucky day folks!
Not only do you get to see how they're made,
but you get to see how you can make them 
with two different types of enchilada sauce!

These Chicken Enchiladas are yummy,
pretty simple to make too,
and can be even made ahead of time.
Keep reading to see how they're made!

The Goods:
Chicken Breasts
Corn Tortillas
Yellow Onion
Garlic
Taco Seasoning
Cheese
Red Enchilada Sauce
Green Enchilada Sauce
Olive Oil (Not pictured - oops!)

Season your chicken with taco seasoning and a little olive oil.
I use a homemade mix, but use whatever you'd like.
Roast your chicken in the oven until fully cooked.

Once the chicken has cooled enough to touch,
start shredding it using two forks.

Now it's time to saute your onion and garlic in a little olive oil.
Once they're nice and fragrant remove from the heat...

And add to the bowl of shredded chicken.
Toss everything together so it's evenly mixed.

It's almost time to assemble and roll your enchiladas!

Get your pan(s) prepped - spray with PAM and then add a thin layer of sauce.
Since I was doing two kinds, I had one with red and the other with green.

Lay corn tortilla on a flat surface and add filling to your liking.
You'll want enough filling so your enchilada is hearty, 
but not too much so you can't roll the tortilla.

Roll the tortilla up and place it seem side down into the sauce.

Keep rolling until your pan(s) are full and you've used all the filling.
Then cover with more sauce (the same kind you used on the bottom).

If you're baking the enchiladas right away, top with shredded cheese.
Use whatever your little heart (and taste buds) desires,
but I tend to use cheddar with red sauce and jack cheese with green sauce.

Bake at 350 degrees for about 15 minutes - until cheese is melted.
Now all that's left to do is dig in and ENJOY!
(But don't burn your mouth with hot cheese!!!)

If you're not baking them right away,
leave the cheese off and add when it's time to bake.

Freeze in baking dish(es) that are tightly sealed in zipper bags.

Chicken Enchiladas
1 pound chicken breasts
16 corn tortillas
1 medium yellow onion - diced
2 cloves garlic - minced
1 tablespoons olive oil, divided
1 to 1 1/2 tablespoons taco seasoning
1 cup shredded cheese (1/2 cup cheddar, 1/2 cup jack)
1 10-ounce can red enchilada sauce
1 10-ounce can green enchilada sauce

  1. Season your chicken with the taco seasoning and 1 tablespoon of olive oil.
  2. Roast at 350 degrees for about 40 minutes - until fully cooked.
  3. Let chicken cool and then start shredding with two forks. 
  4. Saute your onions and garlic with the remaining table spoon of olive oil. 
  5. Once fragrant, remove from heat and add to shredded chicken. Toss to combine.
  6. Spray your pan(s) with pan and put a thin layer of enchilada sauce on the bottom.
  7. Microwave your tortillas for about 30 seconds to make them easier to roll.
  8. Add about 1/4 cup of filling to each tortilla and roll up to form enchilada. 
  9. Place rolled enchiladas in pan, continuing until each pan is filled. 
  10. Top with remaining enchilada sauce.
  11. If freezing to bake later (in the next few months at most!), leave the cheese off and add when ready to bake. Freeze in baking dish(es) that are tightly sealed in zipper bags. Then add cheese before ready to bake. 
  12. If baking the enchiladas right away, add shredded cheese and bake at 350 degrees for about 15 minutes - until cheese is melted.


Sunday, March 29, 2015

Turkey and Quinoa Stuffed Peppers

One of my friends is always posting pictures of dinners she makes.
They always look so good and make me so hungry!
She recently posted Stuffed Peppers that she made.
They looked amazing and I couldn't help but ask for her recipe.

She didn't follow a recipe, but instead just made it up herself.
I was impressed and couldn't wait to make them!
And now here I am sharing their deliciousness with YOU!!!

The Goods:
Cooked Quinoa
Ground Turkey
Onion
Garlic
Jalapeno
Bell Peppers
Corn
Black Beans
Green Chilis
Tomato Sauce
Taco Seasoning
Cheddar Cheese (Not pictured - oops!)
Saute your onion and garlic until fragrant.
Add chipped jalapeno and ground turkey.
Cook until the ground turkey is browned.

Season with taco seasoning and then add tomato sauce.
Stir to combine with ground turkey mixture.

Add your corn and black beans, then stir again.

Now time for the quinoa!
Add that and stir.

Last, add the green chili and stir one last time.

Prep your peppers by washing, deseeding and cutting them in half.
Then stuff, and I mean STUFF, them with your turkey quinoa mixture.

Spray your covered baking dish with cooking spray.
Add the number of peppers you want to bake and cover with cheese.
I only baked three of the eight I prepared,
but froze the remaining ones to bake sometime soon!

Cover the baking dish and bake for 40 to 50 minutes.

Ta da!
Now time to dig in and enjoy!!!

If you want the peppers to be less crisp, you can do one of two things:
1. Cook a little bit longer 
or 
2. Add 1/2 cup of chicken broth to the dish before baking.

Turkey and Quinoa Stuffed Peppers Recipe
4 to 5 bell peppers
1 1/2 cups cooked quinoa
1 pound ground turkey
1/2 onion - chopped
1 garlic clove - minced
1 jalapeno - minced
1/2 cup black beans
1/2 cup corn
1 can green chilies - diced
7 oz can tomato sauce
1 teaspoon taco seasoning
fresh cilantro
fresh parsley
salt and pepper to taste
cheddar cheese - shredded

  1. Preheat oven to 400.
  2. Sauté onion and garlic until fragrant. 
  3. Add jalapeño and cook one minute.
  4. Add ground turkey and brown.
  5. Season with salt, pepper and taco seasoning.
  6. After five minutes or so, add tomato sauce 
  7. Once cooked, combine in a bowl with quinoa, black beans, corn and green chiles.
  8. Add chopped cilantro and parsley to your liking
  9. Put mixture into peppers. 
  10. Spray a Dutch oven. Put the peppers into a Dutch oven and cover the peppers with cheese. 
  11. Put the lid on and bake 40 to 50 minutes.

Friday, February 13, 2015

Quinoa Broccoli Cheddar Bites

A few weeks ago one of my friends shared this recipe on their Facebook.
I love quinoa, so as soon as I saw it I made a mental note to make it soon.
Soon didn't take too long to come and after tasting these little bites,
I knew it was a recipe I wanted to share on my blog.

These Quinoa Broccoli Cheddar Bites are easy to make,
so you'll be enjoying their deliciousness in very little time.
Keep reading to see how easy they really are to make!
I think you'll be happy with the outcome.

The Goods:
Quinoa
Broccoli
Cheddar
Onion
Garlic
Egg
Red Peppers
Paprika
(Full recipe found in link above)

Get your ingredients all prepped.
Cook your quinoa, 
chop your broccoli, 
dice you onion,
mince your garlic
and shred your cheese.

Then throw everything into one bowl....

And mix until everything is well combined.

Spray your mini muffin pan and fill with the mixture.
Note - I halved the original recipe and still had 24 bites.

Bake at 350 degrees for 10 to 20 minutes,
or until the edges turn golden brown.

Cool in the pan for a minute or two,
then remove and finish cooling on a wire rack.

I ate a few these delicious bites the day they were made,
but also enjoyed them reheated over the next few days.

Wednesday, January 29, 2014

Apple and Onion Pork Loin "Roast"


In this post, I told you about the AMAZING Pork Loin Roast I made on my stovetop because my oven was broken. (Note - my oven is fixed now, but it wasn't fixed the next day as I'd hoped.)

I already told you about the deliciousness, so let me show you how I made it!
Original recipe can be found here.

The Goods:
Pork Loin
Apples
Onion
Apple Juice
Chicken Stock
Olive Oil
Salt
Pepper
Bay Leaf

Heat olive oil over high heat and sear pork on all sides.
Add apple juice, broth, sliced apples, onion and bay leaf. 
Bring to a boil, reduce heat and simmer for an hour and a half or longer depending on size of pork.

 Once cooked, remove the pork, the apples and the onions.
Let the pork rest and then slice.

 Raise heat, bring the liquid to a boil and reduce until thick.
Serve over the sliced pork with apples and onions on the side!

Sunday, January 26, 2014

Potato, Ham and Cheese Quiche

A few weeks ago, my friend Renee told me about a quiche she had made with ham. After hearing all about it, I KNEW I wanted to make myself a quiche with ham very soon! 

I couldn't wait very long - I made the quiche just a few days later and had it for dinner with Elina. My ham quiche was a little different than Renee's, but I'm sure both were quite tasty! 

The Goods:
Pie Crust
Eggs
Milk
Cream
Ham
Cheddar Cheese
Cubed Potatoes
Onion
Salt
Pepper

Mine had thick cut ham, shredded medium cheddar cheese, cubed potatoes and sauteed onions. 
Oh and eggs, of course eggs!

Once everything is prepped, putting the quiche together only takes a few minutes. But then you have to wait about 40 minutes to enjoy the deliciousness! 


It's worth the wait though, I promise!


Elina and I enjoyed the quiche with homemade salsa and a chopped salad.

Sunday, January 5, 2014

Sunday Night Dinner: Take 36

It's been awhile since I posted a Sunday Night dinner post.
My entire schedule has been all messed up due to the holidays, 
but I'm pretty sure it's back to normal - at least for now!

So as some of you know - my oven is broken!
It worked Friday night, but refused to preheat last night.
It should be fixed tomorrow...

But that didn't help me tonight when I wanted to make 
A ROASTED Pork Loin, ROASTED Potatoes and ROASTED Broccolini.

I was sad.
I had already gone grocery shopping and everything.
I wanted my roasted Sunday Night Dinner gosh darn it!

But I realized there was nothing I could do, so I found a different recipe instead!

I made a completely different meal than I originally planned...


I made this AMAZING Pork Roast (look for a future blog about this - it's THAT good!!), Whole Wheat Egg Noodles and Steamed Broccolini.

While this meal was not what I'd originally intended to make tonight, 
I'm SO happy that I ended up making everything I did.
And one of the best parts is that I get to enjoy this meal again as leftovers tomorrow night!!

Sunday, December 8, 2013

Robyn Recreates Olive Garden Favorites

Yup, you read that right!!
I have recreated not one, but TWO Olive Garden dishes that are favorites to many!


While I haven't had Olive Garden in years, I still remember what their signature salad tastes like. I used to go there just because of their amazing salad and breadsticks.

The salad was all about the dressing and I think I got pretty darn close to the real thing. I was reassured when a girlfriend I had over that night agreed that it was pretty spot on! 


Sadly, their breadsticks wasn't something I made - I haven't taken that on yet!
(Who knows, maybe soon?)

The second Olive Garden knock off I made is something I made twice in one week and just couldn't get enough. I made Zuppa Toscana Monday night and again on Friday, which was perfect for the cold evenings we've been having.


And the finished product...

So, so, SO good!!!

Since I didn't make breadsticks, I did the next best thing and made savory monkey bread muffins. They were amazing and not a single one was leftover!!!


Sunday, December 1, 2013

Sunday Night Dinner: Take 35

I'm back with a real quick Sunday Night Dinner post! 

It's been awhile since I've done one of these posts, 
but I'm here now to tell you about this dinner that includes an amazing recipe reminding me of my childhood!


Growing up, I remember having meatloaf on a pretty regular occasion. 
I loved it. I ate it without complaining! That is until I gave up eating beef! 

I don't think I've eaten a bite of meatloaf since then...until today!!!

I made mini turkey meatloaves with a slice of bacon on top. 
I wasn't originally planning on adding the bacon, but I'm real glad I did! 
The meatloaves were super moist and delicious. Very similar to how I remember mom's tasting!

With the meatloaf, I made some carmalized sweet potato rounds. 
They were SO GOOD and I will be blogging about them very soon.

Finally, I finished the meal with a green vegetable - frozen peas. 
Yes folks, I said frozen peas! I actually really like them and think they went with the meal quite well.

All in all, I think tonight's meal was a great Sunday Night Dinner!!!