Pages

Sunday, January 31, 2016

Homemade Chicken Pho

I was with my aunt and uncle the first time I had pho.
I loved it from the very first bite,
so we started talking about me attempting to make it.
I knew it wouldn't be easy,
but I wanted to give it a shot anyway.

So when I stayed with them for a few days,
I found this recipe and decided to give it a try!
 And of course, because I'm me and don't do things the easy way,
I decided to modify the recipe by chaing a few things.
Take a look below at how I made homemade chickn pho!

The Goods:
Yellow Onions
Fresh Ginger
Water
Bone-in Chicken Breasts
Chicken Drumsticks
Salt
Sugar
Cardamon Seeds
Coriander Seeds
Fennel Seeds
 Fish Sauce
Dried Rice Noodles
Scallions
Bean Sprouts
Mint (or Thai Basil)
Cilantro
Limes
Jalapenos
Chili Oil
Siracha
Hoisin Sauce
Shallots

Quarter two onions and smash three, 1/2 inch pieces of ginger.
Place in lightly oiled pan and roast at 400 degrees for 30 minutes,
or until soft and chared. 
 
While roasting, fill a LARGE pot with water and bring to a boil.

The finished chared onions and ginger.

Once the water is boiling, add the chared onions, ginger, chicken, salt, 
sugar, corriander seeds, cardimon seeds, fennel seeds and bring to a boil.

Return to a boil, reduce heat and simmer for about 30 minutes,
until all chicken is fully cooked.

Once cooked, remove chicken from the broth and cool slightly.
Take all the meat off the bone and refrigerate the chicken,
saving the skin and bones to return to the broth.
 
Put the skin and bones back into the broth and simmer twelve hours.
Yes - TWELVE HOURS!!!
 I did it overnight and it worked out perfect.

After twelve hours, broth should be reduced by half,
so remove the bones, skin, onions and ginger.
Then strain at least twice using cheesecloth.
 
Now add the fish sauce, adjusting to your taste.
If needed, add additional salt too.

Make sure to keep your broth really warm...

While you get all your garnishes prepped...

And your table set so you're ready to dig in!

Now it's time to prepare your noodles according to the package directions.

Oh and get your bowls and meat ready to go too!!

Place a nice helping of noodles on the bottom of your bowl,
followed by your cooked, chilled chicken.

Ladle a bunch of super hot broth on top of the noodles and chicken,
sprinkling some shallots on top too.
 
Lastly, finish off with whatever garnishes you desire and then dig in!!!

OH MY GOSH YOU GUYS!!!
I'm so amazed at the outcome of this!
I thought it tasted amazing and quite authentic,
and my aunt, uncle and grandma seemed impressed too.
I have only made it once because it's a pretty long process,
but totally worth it in the end!!!

Homemade Chicken Pho
Adapted from Smitten Kitchen
Makes 4 Helpings with Additional Broth

2 Yellow Onions
Fresh Ginger
4 Quarts Water
2 Bone-in Chicken Breasts
12 to 15 Chicken Drumsticks
1 to 2 Tablespoons Kosher Salt
2 Teaspoons Sugar
1 to 2 Tablespoons Cardamon Seeds
1 to 2 Tablespoons Coriander Seeds
1 to 2 Tablespoons Fennel Seeds
1/8 to 1/4 Cup Fish Sauce
1 Pound Dried Rice Noodles
2 Scallions, Thinly Sliced
1 Bag Bean Sprouts
1 Bunch Mint (or Thai Basil)
1 Bunch Cilantro
2 to 3 Limes, Cut into Wedges
2 Jalapenos, Thinly Sliced
Chili Oil
Siracha
Hoisin Sauce
Crispy Fried Shallots

  1. Quarter two onions and smash three, 1/2 inch pieces of ginger. Place in lightly oiled pan and roast at 400 degrees for 30 minutes, or until soft and chared.
  2. While roasting, fill a LARGE pot with water and bring to a boil.
  3. Once the water is boiling, add the chared onions, ginger, chicken, salt, sugar, corriander seeds, cardimon seeds, fennel seeds and bring to a boil.
  4. Return to a boil, reduce heat and simmer for about 30 minutes, until all chicken is fully cooked.
  5. Once cooked, remove chicken from the broth and cool slightly. Take all the meat off the bone and refrigerate the chicken, saving the skin and bones to return to the broth.
  6. Put the skin and bones back into the broth and simmer twelve hours.
  7. After twelve hours, broth should be reduced by half, so remove the bones, skin, onions and ginger. 
  8. Strain at least twice using cheesecloth. 
  9. Now add the fish sauce, adjusting to your taste. If needed, add additional salt too. 
  10. Keep your broth really warm while you get your garnishes all ready.
  11. Prepare your noodles according to the package directions.
  12. Place a nice helping of noodles on the bottom of your bowl, followed by your cooked, chilled chicken. (Note - you can substitue SUPER THIN sliced beef instead of the chicken if you'd like.)
  13. Ladle a bunch of super hot broth on top of the noodles and chicken, sprinkling some shallots on top too.
  14.  Lastly, finish off with whatever garnishes you desire and then dig in!

Friday, January 29, 2016

Friday Favorites: Things That Make "ME"

Happy Friday you guys!!!
I'm back today for another Friday Link Up!
This week, I'm linking up with THREE different groups.
Make sure to check them all out at the bottom of this post!

This is my first Friday Favorites Link Up of 2016,
and I figured what better time than now,
to blog about and share with all of you,
FIVE THINGS THAT MAKE "ME"!!!

I won't waste any time, and jump right in!

I bet this one is obvious...
but COOKING AND BAKING are a huge part of me!
I really enjoy doing both,
especailly if it's for someone specail in my life.


 While this hasn't always been the case,
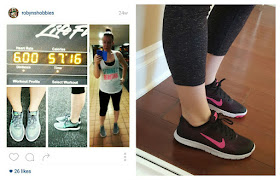
I am really into EXERCISE and feel guilty when I don't.
I've always been an active person,
but last summer something really clicked and I love it!

I have always loved DECORATING.
I love getting festive for lots of differnet holidays,
but I really enjoy every day decorating too.
I'm always looking for ways to change my decor up.


I would be nothing without my FAMILY AND FRIENDS!
I have some truely amazing people in my life
and they are there through the thick and the thin.
I am truly blessed and a very lucky gal!


Last but not least, I kinda love SHOPPING.
 And if I can, I shop onling and get money back.
Who doesn't like free money?!?
If you're not siged up for EBATES already, you should be!!!


Now for more Friday Link Up Fun, check out the blogs below!

Andrea and Erika's blogs from Friday Favorites.

April and Christina's blogs from 5 on Friday.

Karli and Amy's blogs from oh hey friday!


Tuesday, January 26, 2016

Things I'm Lovin' Tuesday: Trader Joe's Cold Brew Coffee

This is a non-sponsored review and I purchased or received as a gift my own coffee.

A few months ago I started another monthly blog series called
THINGS I'M LOVIN' TUESDAY!!!
If you missed the first few, you can find them:
hereherehereherehere and here,
and make sure to check back every last Tuesday of the month!

Now onto what I'm lovin' this month...

If you recall, I am a pretty big coffee fan.
and today I'm here to share with you a little shortcut,
but it's a shortcut that I'm loving!!!

Not too long after discovering cold brew,
I also discovered that Trader Joe's sells an amazing one.
The taste is amazing and the price is right!
I was hooked the first time I purchased it.


So if you like coffee,
but more specifically if you like cold brew,
you should really check out this one from Trader Joe's!
Other fun ways to use it can be found here too!!

Sunday, January 24, 2016

How To: Homemade Balsamic Glaze

I love Balsamic Glaze, but I hadn't made my own until recently.
You can easily buy it in the store, but it's so easy to make your own too.
And because I like to know exactly what's in what I'm eating,
I tend to stick to making things myself whenever I can.

About halfway through making the glaze the first time,
I realized - Hey I should blog about this too!
So not too long after making the first batch, 
I made another to show you guys how easy it really is!

WARNING - while making this you're kitchen,
or entire apartment in my case will have a strong vinegar smell.
It's worth it though, I promise! 

The Goods:
Balsamic Vinegar
Brown Sugar

Add 1/2 Cup Brown Sugar and 
2 Cups Balsamic Vinegar to a saucepan.

Turn heat to medium.

And mix until sugar is dissolved.

Bring mixture to a boil.

Then reduced heat to low and simmer for about 20 to 30 minutes.

Until mixture has reduced by half and has slightly thickened.
It should coat the spoon when dipped into the pan.

Pour into a jar and let cool completely.
Cover and store in the fridge for up to two weeks!

Wednesday, January 20, 2016

Bubble Bath Review: Beauty Counter Kid's Counter Body Wash

This is a non-sponsored review and I was given the Bubble Bath.

Happy Wednesday guys!!!
It's the First Bubble Bath Review of 2016!
I know I'm excited and hope you are too.

Towards the end of last year I was talking to a coworker about Beauty Counter
she's a big fan of their product and I couldn't wait to try them out.
While they don't have a bubble bath, the kid's body wash doubles as one!

I decided, what the heck I'll give it a shot!
My awesome coworker loaned me a bottle to try as well.
 

 Great reading material and an adult beverage of course!


 I started with 10 pumps...then added another 10...
then added another 10 when it was all said and done!
I wanted lots and lots of bubbbbbbbbbles!!!


 I guess I shouldn't have expected TONS from a body wash though.


Just enough bubbles to get sucked into the book!

While I didn't have high hopes for this,
I was presently surprised to be honest!
It's a body wash that doubles as a bubble bath pretty well.
The bubble were there, but they didn't last too long sadly.

So overall, I wouldn't recommend this an an adult bubble bath,
but it'd be great for children! And better than others I've tried even! HA!!

If you missed them, make sure to check out past bubble bath reviews:

Tuesday, January 12, 2016

DIY: Teacup Pin Cushion

For Christmas, I made my grandma a Teacup Pin Cushion.
She loves tea and she is always sewing,
so it seemed pretty fitting that I make this for her.

This DIY project was incredibly easy,
and once I had everything ready to go,
really only took a few minutes to complete!

Take a look at how simple it is!

The Goods:
Teacup
12x12 Square Fabric
Thread
Needle
Hot Glue Gun
Hot Glue
Fabric Scissors

 Add Poly Stuffing to middle of fabric,
enough to fill up teacup plus more to overflow.

 Push needle and thread through gathered fabric one time...

 Making sure there's a knot at the end...

 Then wrap the thread around a few times.
Make sure to pull tight so it's secure.


 Trim off the excess fabric.

 Place dome side up in teacup and hot glue all over to secure.
The more glue the better in my opinion!!!

 Lastly, place some pins in the new pin cushion!!!

Saturday, January 9, 2016

Rainbow Sprinkle Butter Cookies

If you remember my Birthday Cake Donuts post,
you'll know that I LOVE rainbow sprinkles.

And since this is birthday MONTH,
I thought it was only fitting
to do another rainbow sprinkle recipe!!!

So today, I share with you some oh so yummy
BUTTER RAINBOW SPRINKLE COOKIES!!!
The Goods:
All Purpose Flour
Sugar
Butter
Salt
Egg
Vanilla Extract
Rainbow Sprinkles


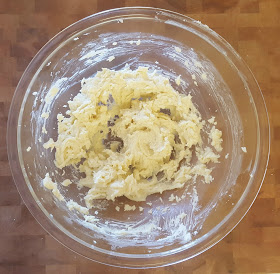
In a larger bowl, cream the butter, sugar, salt and vanilla.


Add the egg yolk and mix until incorporated.

Add the flour and mix until dough forms.

Shape into a long tube and cover in plastic wrap.

Keep in the fridge for at least 2 hours, if not longer.
You can even freeze, covered more securely, for a few months.

Let dough soften slightly, then slice thinly with a sharp knife.

Add rainbow sprinkles and bake for 15 minutes at 350 degrees.

Let cool (if possible) and then dig in!!! 
These may not look like they're anything special,
but man on man they sure taste amazing.
They're buttery and just melt in your mouth!!! 

But wait...

I only used and baked half the dough.
And saved the other half in the freezer,
then made those for a small NYE get together.
But this time COVERED the cookies in rainbow sprinkles!!!


They tasted the same, but I loved this look so much more!

Rainbow Sprinkle Butter Cookies
Adapted from food.com

8 Ounces Butter
3/4 Cup Sugar
1/4 Teaspoon Salt
1 1/2 Teaspoons Vanilla Extract
1 Egg Yolk
2 Cups All Purpose Flour

  1. In a larger bowl, cream the butter, sugar, salt and vanilla. 
  2. Add the egg yolk and mix until incorporated.
  3. Add the flour and mix until dough forms.
  4. Shape into a long tube and cover in plastic wrap.
  5. Keep in the fridge for at least 2 hours, if not longer. You can even freeze, covered more securely, for a few months.
  6. Let dough soften slightly, then slice thinly with a sharp knife.
  7. Add rainbow sprinkles, then bake for 15 minutes at 350 degrees.