Wednesday, March 11, 2015

Sesame Seed Coated Seared Ahi

For the longest time I was afraid to cook Seared Ahi.
I guess I was scared I would mess it up somehow.
But after talking to a friend, she convinced me to try it.
And I was shocked at how easy it really was!!

So after make it a few times,
I decided that even though it is pretty easy,
I should share it on my blog!

The Goods:
Ahi Tuna
Olive Oil
Soy Sauce
Sesame Seeds

Dip your tuna in soy sauce then immediately coat in sesame seeds.

Heat a stainless steel pan over medium-high heat,
add a little bit of olive oil and swirl around to distribute.

Once your pan is hot add your tuna and a few minutes.
I usually flip after two to three minutes,
but for more rare flip after about a minute and a half.

Cook another few minutes until tuna has reached desired doneness.

Remove seared tuna from the pan and let rest a few minutes.
Slice your tuna pretty thin on an angle and serve as desired.

Most recently, I enjoyed mine on a delicious green salad.

Monday, March 2, 2015

Baked Donut Monday: Apple Cinnamon!

At my office, we have Bagel Fridays every week.
Recently a coworker told me she wished we had donuts instead.
I've taken homemade donuts to work on a Monday more than once,
so as soon as she said she wished we got donuts and not bagels,
I immediately had a light bulb go off in my head!

I've decided to make Baked Donut Monday into a blog series.
I'm hoping to post a NEW baked donut recipe every 1st Monday of the month!
Make sure to check back each month for something new.

For the very first Baked Donut Monday post, 
I'm going to tell you all about some delicious
APPLE CINNAMON DONUTS!!!

The Goods:
Flour
Sugar
Brown Sugar
Baking Powder
Baking Soda
Salt
Cinnamon
Egg
Apple Butter
Vanilla
Honey
Apple Juice
Sour Cream
Vegetable Oil
Butter (Oops! Not pictured!)
(Full Recipe at bottom of post!)

I was inspired by this recipe on a blog I read often.
Silly me, I didn't read the recipe fully the first time,
and when I went to make it, I was missing Apple Butter.
So I tried to make do, but I didn't love the end result.

After purchasing the Apple Butter weeks later,
I decided to try again, but was now without Apple Cider.
I didn't want to buy a HUGE jug of it,
so I substituted Apple Juice for the Apple Cider
and made a few other small changes too.

Preheat your oven to 375 degrees.
Grease your donut pan and set aside.
Now get to work making the dough!

In one large bowl, combine the following:
flour baking powder, baking soda, salt, cinnamon and brown sugar.
In another large bowl, combine the following:
egg, apple butter, vanilla, honey, apple juice, sour cream and oil.
Combine the wet ingredients with the dry ingredients and mix until blended.

After making a few batches of donuts,
I've found it's easiest to transfer your dough to a gallon zipper bag.
This will make filling the donut pan MUCH easier!

 Cut off the the tip of the zipper bag and fill your donut pan 1/2 to 3/4 full. 
Bake for about 10 minutes, remove from oven and start cooling in the pan.

After a few minutes, remove from pan and cool on a wire rack.

While they're cooling, get your topping ingredients ready.
Simply melt your butter in the microwave 
and combine your cinnamon and sugar in a separate dish.

Your donuts should still be slightly warm and it's time to finish them.
Brush both sides with the melted butter...

Then roll in cinnamon sugar mixture until coated.
And then they're done!
(Note - there are so many here because I doubled the recipe.)

I didn't wanted to be temped by all those donuts, 
so I packaged some up for neighbors...

Then I ate one (ok maybe two!) 
and got the rest ready to take to work!

Apple Cinnamon Donut Recipe
Adapted from Christina's Recipe

For the donuts:
2 cups flour
1 1/2 teaspoons baking powder
1 1/2 teaspoons baking soda
1/2 teaspoon salt
2 teaspoons cinnamon
2/3 cup brown sugar
1 egg
1/2 cup apple butter
1 teaspoon vanilla extract
1/3 cup honey
1/3 cup apple cider
1/3 cup sour cream
2 tablespoons canola oil
For the topping:
4 tablespoons unsalted butter
1/2 cup sugar
3 tablespoons cinnamon
  1. Preheat oven to 375 degrees, grease a donut pan and set aside.
  2. In a large bowl, combine the flour, baking powder, baking soda, salt, cinnamon and brown sugar. 
  3. In another large bowl, whisk the egg, apple butter, vanilla extract, honey, apple cider, sour cream and oil. 
  4. Pour the wet ingredients into the dry ingredients and mix with a hand mixer.
  5. Transfer donut batter into large zipper bag and fill donut pan until 1/2 to 3/4 full. 
  6. Bake for about 10 minutes and cool on a wire rack. 
  7. While donuts are cooling, melt butter for the topping in a microwave safe dish. 
  8. In a separate dish, combine the remaining sugar with the cinnamon. 
  9. Brush both sides of the donut with butter and roll in sugar mixture until coated.
Makes 8 to 10 donuts.
(Note - I had so many because I doubled the above recipe!)

Don't forget to check back in April for the next yummy donut!!!

Wednesday, February 25, 2015

Sours and Flowers

Remember a few months ago when I posted this?
I'd hoped to post about my garden again before now,
but sadly time has just kinda slipped away from me.
And if I'm being honest, there wasn't anything exciting to share.

But now...now there is!
What's that you ask?
Well let me tell you.
My lemons are starting to change color!


I'm SO excited!!!!
I noticed a little yellow spot not too long ago.
And wouldn't you know, the spot kept growing!
I still haven't picked my first lemon, but hopefully soon.


My last garden post was only about my lemon tree,
so I decided I couldn't leave my flowers out again.
While it's been beautiful in Southern California,
it is still winter so I only have a select few!


As I said last time,
I hope to post about my garden more often.
And with the temps getting warming I hope to add more too.
So please keep checking back often for more garden updates. 

Friday, February 20, 2015

Vodka Blush Sauce with Bucatini

I've had this recipe a looooong time - a few years at least. 
I can't even remember where I originally found it,
but it's been in my recipe binder just waiting to be made.

While doing my weekly meal planning I've passed it many times,
but I recently had a HUGE craving for some kind of pasta,
so I finally whipped out my recipe for Vodka Blush Sauce!

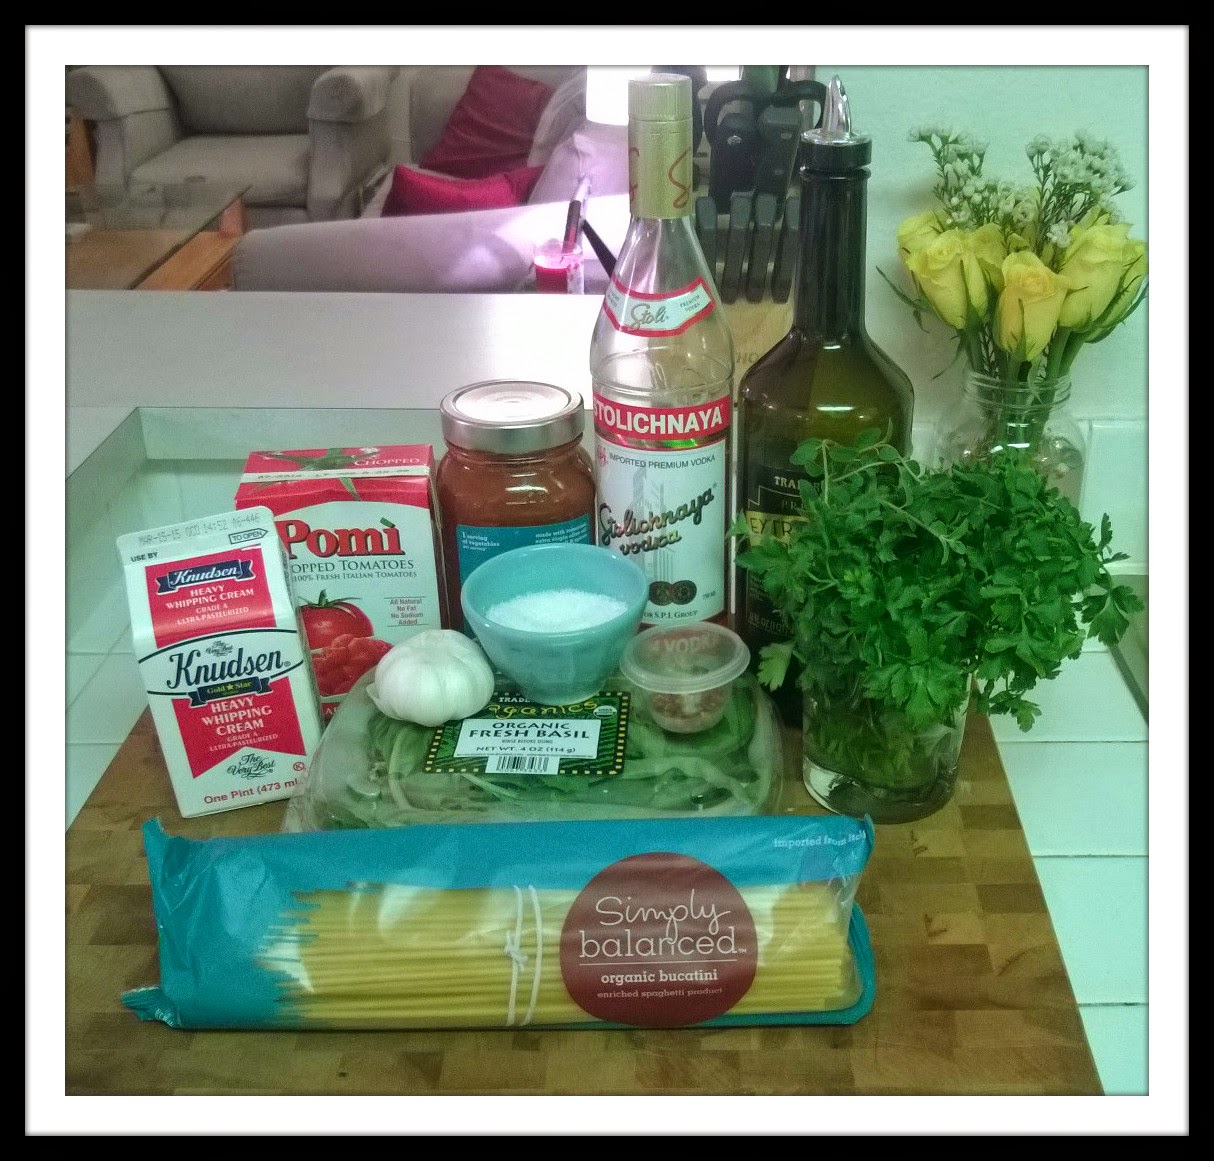
The Goods:
Bucatini Pasta
Olive Oil
Vodka
Marinara Sauce
Chopped/Diced Tomatoes
Heavy Cream
Garlic
Salt
Red Pepper Flakes
Fresh Basil
Fresh Flat Leaf Parsley
Fresh Oregano
 Parmesan Cheese (Not pictured - oops!)
(Full Recipe at bottom of post!)

Heat the olive oil in a large pan, add garlic and red pepper flakes.
Saute for about 30 seconds - until garlic is starting to get fragrant. 
Add marinara sauce, stir, add the chopped tomatoes and stir again.

Next measure out your vodka and add to the sauce.

Add a whole bunch (that's how I measured at least) of fresh herbs!
I used fresh basil, flat leaf parsley and oregano.
Stir to combine and bring to a simmer.
Cook the sauce for about 15 minutes...

Until it looks something like this!

Now add your cream.

Give it another good stir and your sauce is almost done!
Let it simmer 5 more minutes.

At the last minute, I decided the sauce needed something more.
So I added a whole bunch (again - how I measured!) of fresh parmesan.

While the sauce was first simmering, I started my pasta.
I chose to use bucatini, but any pasta would be fine.
Just cook according to the package directions.
OR if you have time - make your own!

Once your pasta is cooked drain it well.

Then add the pasta to your sauce and fully combine together. 
And that's it folks! 

Serve with a little more fresh parmesan and herbs.

This recipe is so easy to make and can even be enjoyed by little ones.
The vodka cooks off, but leaves an amazing taste to the sauce.
I didn't time how long it took me, but I'm betting it was around a half hour.

Vodka Blush Sauce with Bucatini
1 tablespoon olive oil
1 clove garlic, minced
1 heaping teaspoon red pepper flakes
1 large box (26.5 oz) chopped tomatoes
1 jar (24 oz) marinara sauce
2 tablespoons (+/-) fresh flat leaf parsley
1 tablespoon (+/1) fresh basil
1 teaspoon (+/-) fresh oregano
1/4 vodka
1/2 cup heavy cream
fresh parmesan to your liking
salt to taste
1 pound bucatini

Note: the herb measurements should be your guideline,
but as shown above I didn't accurately measure those myself. 

  1. Bring a large pot of salted water to a boil and cook your pasta according to the package directions. (You should start the pasta once your sauce is simmering the first time.)
  2. In a large saute pan, heat the olive oil then add your garlic and red pepper flakes. Cook for about 30 seconds.
  3. Add marinara sauce and chopped tomatoes, then stir to combine.
  4. Add the vodka and stir again.
  5. Add the fresh herbs, stir once again. 
  6. Bring the sauce to a simmer and cook for about 15 minutes.
  7. Add the heavy cream, stir and simmer 5 more minutes.
  8. Add the freshly grated parmesan and stir.
  9. Drain your pasta fully, add to the sauce and combine fully.
  10. Serve with more fresh parmesan and herbs.

Friday, February 13, 2015

Quinoa Broccoli Cheddar Bites

A few weeks ago one of my friends shared this recipe on their Facebook.
I love quinoa, so as soon as I saw it I made a mental note to make it soon.
Soon didn't take too long to come and after tasting these little bites,
I knew it was a recipe I wanted to share on my blog.

These Quinoa Broccoli Cheddar Bites are easy to make,
so you'll be enjoying their deliciousness in very little time.
Keep reading to see how easy they really are to make!
I think you'll be happy with the outcome.

The Goods:
Quinoa
Broccoli
Cheddar
Onion
Garlic
Egg
Red Peppers
Paprika
(Full recipe found in link above)

Get your ingredients all prepped.
Cook your quinoa, 
chop your broccoli, 
dice you onion,
mince your garlic
and shred your cheese.

Then throw everything into one bowl....

And mix until everything is well combined.

Spray your mini muffin pan and fill with the mixture.
Note - I halved the original recipe and still had 24 bites.

Bake at 350 degrees for 10 to 20 minutes,
or until the edges turn golden brown.

Cool in the pan for a minute or two,
then remove and finish cooling on a wire rack.

I ate a few these delicious bites the day they were made,
but also enjoyed them reheated over the next few days.

Sunday, February 8, 2015

Homemade Freezer Meals!

I absolutely love cooking, but with my schedule 
I don't always have time to whip up a homemade meal.

So over the years, I've become smarter
and realized I can make certain things ahead of time,
pop them in the freezer and then bake/heat at a later time!
This has come in hand on NUMEROUS occasions.

You've read about all of these recipes before,
but I thought I'd put them all in one place for you.
For most of the recipes listed -
I usually make enough to eat once (and have leftovers) 
and a similar size to freeze and eat again soon!


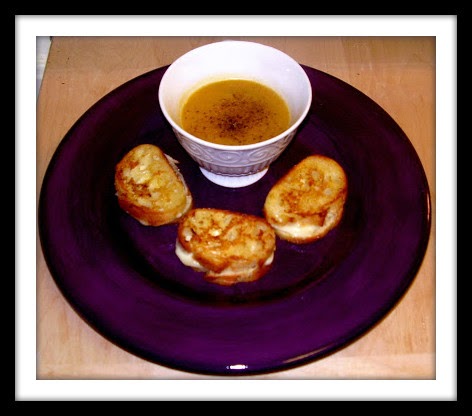
Soup

Soup

and MORE Soup 

I have some ideas for more freezer meals to make in the future,
but am always looking for suggestions so please send them my way!

Wednesday, February 4, 2015

Chicken Spaghetti

When I first saw this recipe, I didn't know exactly what to think.
I knew I was intrigued, but I'd never made anything like it, 
so I wasn't exactly sure what to expect taste wise.

I put off making it and sorta forgot about it for awhile.
and I knew right then and there that I had to try it!

Keep reading to see how it's made,
and to find out what I really thought after tasting.

The Goods:
3 Cups Rotisserie Chicken
1 Package Spaghetti
1/4 Cup Onion - Diced
1/4 Cup Bell Pepper - Diced
 1 Can Cream of Chicken Soup
2 Cup Cheddar Cheese - Shredded
1 Teaspoon Seasoned Salt
1/4 Teaspoon Cayenne Pepper
Salt and Pepper to Taste
2 Cups Chicken Broth
(Not pictured - OOPS!)

Get all your ingredients ready - 
Shred, chop, dice, you know!

Boil your water and cook your spaghetti until al dente.
Drain and return to cooking pot.

Add all but 1 Cup cheese and mix well.

Put mixture into greased baking pan - or two if you're like me!
Cover generously with cheese.

Bake at 350 for about 45 minutes.

OR

If you're like me...

Bake one and freeze one to be enjoyed soon!

I
In the freezer ready to be baked and eaten.

So I bet you're curious what I thought.
That's probably the only reason you read this far!
Well...I love it!
I am so glad I made two
and I can't wait to eat it again!!!