Pages

Thursday, April 30, 2015

April Garden Update

When I posted my March Garden Update last month,
I mentioned that I was starting something new,  
where I post a Garden Update the last day of every month!

So since today is the last day of the month,
I have the April Garden Update for you!!!

Let me start off by saying how much I dislike caterpillars.
Yes -I know they turn into moths and beautiful butterflies,
but they also make gardening much more frustrating!

Need past proof?
Check herehere, here, here AND here.
To say I'm not a fan would be an understatement.

So you can bet I was super upset when I saw one eating my Thyme!
See that lil sucker towards the top left of the picture?
GRRRRRRR!

And shortly after I noticed another one eating my Oregano!
No, no, no.
Just no!!!

My poor, sad Oregano was done for.
Hope those leaves were tasty - 
since that was your last meal Mister Caterpillar!

Luckily they haven't found the jalapeno plant yet,
because it's still thriving and growing!

And look new pepper buds!
I thought there were only two at first...

But from another angle I noticed there were FIVE!!!

And then just a few days later,
a few of the buds had become flowers!

I thought for sure I'd have picked my first lemon.

Well sadly I was wrong!
They're so close - but still a little too green!

I was still hoping I'd get to pick the first one real soon!

Except to my surprise, there wasn't much picking!
Nope - just a few days after snapping the two previous photos,
I was outside watering and hardly touched the lemon when it fell off!

Not a giant lemon by any means,
but it's still my first homegrown lemon 
and one could say that I'm proud!!!

I was shocked again this past weekend.
 I found a second one that had fallen off as well.
C'mon lemonssssssssss!

Not only have I been able to pick some lemons, 
but the mums I bought in the Fall are blooming again too!
They've had buds for awhile, but only recently bloomed again!

While the mums are doing great, that's not the case for all my flowers.
I ripped out the dying flowers and their coconut liners
and hope to redo that area of my garden soon!!!

And last, but certainly not least - my gardenia bloomed!!!!
I've had this plant for over a year and it never flowered.
Not once. It'd get buds, but never any flowers!

I was in shock and couldn't get over how amazing it smells!
There are currently four other buds on the plant
and I hope they all become flowers too.

As a reminder -
I will be blogging about garden updates 
every last day of each month.

It may not be a complete update each month,
but it will be about something in the garden.

So keep coming back to see what I have growing!

Sunday, April 26, 2015

Mini Turkey Meatloaves

Growing up I remember my mom making meatloaf countless times.
It's not a meal I've eaten regularly as an adult,
but I recently had a craving for some that wouldn't go away!

So what'd I do?
I gave her a call and asked for her recipe of course!
I made a few small changes, but it still tasted like I remember as a child.

The Goods:
Ground Turkey
Shredded Wheat
Milk
Onion
Egg
Fresh Herbs
Salt
Pepper

Dump everything in a big bowl and mix it up.
I used my hands (clean of course!) because they make the best tools.
And because that's how my mom did it when I was little.

Once mixed well, transfer to your baking dish.
I wanted mini loaves, but use whatever dish you desire!

Bake at 350 degrees for about 20 minutes.
Remove from the oven and brush tops with ketchup.
Return to the oven and bake 20 to 25 more minutes.

No one ever said that meatloaf was a pretty meal,
but man does it sure taste great!
Comfort food at it's finest, people!

Serve warm with some yummy sides.
I chose mashed sweet potatoes and roasted broccoli - YUM!

Mini Turkey Meatloaves
1 1/4 Pound Ground Turkey
1 Cup Shredded Wheat
1 Medium Onion - diced
1 1/4 Cups Milk
1 Egg
1 Teaspoon Salt
1/4 Teaspoon Pepper
Fresh Herbs to your liking

  1. Preheat oven to 350 degrees.
  2. Add all ingredients to a large bowl and mix well. 
  3. Transfer mixture to your greased baking dish(es) and bake for about 20 minutes.
  4. Remove from oven and bush top of loaves with ketchup.
  5. Return to the oven and bake 20 to 25 more minutes.


Friday, April 24, 2015

Favorite Picnic Recipes!!!

Happy Friday Everyone!!
I'm back today for another Friday Link Up!
And again, I'm linking up with THREE different groups.
Make sure to check them all out at the bottom of this post!

Now that it's Spring and the weather is getting warmer,
I bet a lot of you will be spending much more time outside.
So today I though it'd be a great time to share
FIVE FAVORITE PICNIC RECIPES!!!

I have made every recipe below at least once.
They can be enjoyed both in the comfort of your own home,
but also on a fun outdoor picnic with family or friends!

1. Quinoa Broccoli Cheddar Bites
These are great either hot or cold.
And can even be made a few days in advance!

2. Chopped Italian Salad
If you won't be eating this right away,
I'd suggest keeping the dressing and salad separate,
and tossing right before you're ready to dig in!

3. Crock Pot Buffalo Chicken - 3 Ways!
Another recipe that can be eaten hot or cold!!
I'll be honest and I actually prefer the chicken cold.
And with three different options - you can please multiple palates.

4. Quinoa Apple Salad
This is just one of the many quinoa salads I make on a regular basis.
They're so easy to make, super filling and incredibly tasty!!
You can see a few more here, here and here.

5. Homemade Hummus and Pita Chips
While store bought hummus and pita chips are good,
there's just something about homemade that makes them better!!!

And as a bonus, I'm giving you a SIXTH recipe,
which is a mighty tasty and fun little dessert!

6. Strawberry Shortcake Push-Up Pops

Now for more Friday Link Up Fun, check out the blogs below!

Andrea and Erika's blogs from Friday Favorites.

April and Christina's blogs from 5 on Friday.

Karli and Amy's blogs from oh hey friday!

Wednesday, April 15, 2015

Bubble Bath Review: Aura Cacia Foam Bath

This is a non-sponsored review and I purchased my own Foam Bath.

Last month I shared my thoughts on Lush Bubble Bars in this post.
And since I love taking bubble baths (one may even consider it a hobby!),
I thought I'd continue doing Bubble Bath reviews every month!

Towards the end of 2014, I saw Aura Cacia Foam Bath on another blog.
I'd never tried anything like it but I was quite intrigued.
And wouldn't you know, shortly after I found some at Sprouts!

What I left Sprouts With:
Pictured from Left to Right
Invigorating Ginger & Mint Foam Bath
Relaxing Lavendar Foam Bath
Refreshing Tangerine & Grapefruit Foam Bath
Clearing Eucalyptus Mineral Bath

These are SO easy to use!
You simply tear open the package 
and then pour it under running water.
Shortly after you have an amazing bubble bath!

Wondering what I do while soaking in the tub???

I tend to read a book (or magazine) while sipping an adult beverage.

I have tried all four pictured above and even went back for more!!
While the Mineral Bath was great, it didn't produce and foam or bubbles
so keep that in mind if you're purchasing some for yourself.

Like I said, I originally found mine at Sprouts,
but have also seen them at Whole Foods before too.
But if you can't find them, try here, here or here!
(If purchasing through the last link, make sure to do so though Ebates in order to get cash back!)

Sunday, April 12, 2015

DIY: Herb Garden Chalkboard Pots

I said I'd blog about my DIY Chalkboard Pots soon.
Well folks, soon is now here!

This project was pretty simple to complete,
and honestly didn't cost much because I owned all the pots.
Check out how I spent little time transforming my herb garden!

The Goods:
Ceramic Pots
Painters Tape
Chalkboard Spray Paint
Colored Spray Paint
Paper Drop Cloth
Chalk (Not Pictured)

Tape a thick line saperating the top portion of the pot from the bottom.

Using Chalkboard Spray Paint cover the top portion and the pot saucers.

Let it dry then remove the tape.

Once dry, completely cover the chalkboard areas with painters tape.

Then spray paint the rest of the pot whatever color you would like.

I personally love this shade and thought it was great for Spring!

Let dry and then remove tape.

Touch up with paintbrush where necessary.

Replant the herbs you have growing.


And using chalk label each pot.

That's it!
Super easy.
Super cute.

Saturday, April 11, 2015

Simplified Cinnamon Sugar Pull Apart Bread

I've made Cinnamon Sugar Pull Apart Bread before.
And I even blogged about it in 2011 here.
It was so good, but does take some time.

I've thought about making it again, 
but just never got around to doing so.
That is until I found a MUCH more simple way!

While browsing other blogs I found this recipe and was blow away!
Pizza dough to make Pull Apart Bread?
I knew I needed to try that.

And try is exactly what I did not too long ago.
But because I'm me, I can't do things "normal"
Nope, instead I turned it into MINI Pull Apart Loaves.

Keep reading to see how easy and delicious they really are!!!

The Goods:
Refrigerated Pizza Dough
Butter
Sugar
Cinnamon
Nutmeg
Mini Loaf Pans

Mix up your sugar and spices.
I had more than enough and used the following:
1 cup sugar, 2 teaspoons cinnamon and 1/2 teaspoon nutmeg.

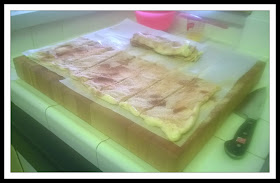
Remove your pizza dough from the tube and roll it out flat.

Melt your butter and then liberally brush it on the pizza dough.

Now sprinkle the sugar and spice mixture all over.

Cut the dough in half horizontally.
And then cut each half into eight pieces vertically.
You should end up with 16 long, thin strips of dough.

Stack one complete side (eight pieces) on top of each other.

Repeat with the other eight pieces so you have two stacks of eight.

Next, cut each stack into four pieces.

Grease two mini loaf pans.
Put all of one sack of dough in one pan,
and all of the other stack in the second pan.

Bake at 350 degrees for 25 to 30 minutes.
Cover with foil if starting to darken too fast.
Remove from oven when deep golden brown.

Cool in the loaf pans for about 30 minutes.

Using a butter knife, loosen the bread from the pan.
Then carefully remove and place it on a plate to serve.

Start pulling those pieces apart and ENJOY!!!

Now that I know how easy I can make Pull Apart Bread using Pizza Dough,
I'm not sure if I'll ever be patient enough to make it the "old" way again!

Cinnamon Sugar Pull Apart Bread
1 Tube Refrigerated Pizza Dough
2 Ounces Unsalted Butter - Melted
1 Cup Sugar
2 Teaspoons Cinnamon
1/2 Teaspoon Nutmeg
Mini Loaf Pans (Optional)
  1. Remove pizza dough from the tube and roll out flat.
  2. Brush melted butter liberally over the entire pizza dough.
  3. Combine sugar, cinnamon and nutmeg then sprinkle all over the pizza dough.
  4. Cut pizza dough in half horizontally.
  5. Cut each half into eight strips vertically.
  6. Make two stacks of dough with eight strips in each stack.
  7. Cut each stack of dough into four pieces.
  8. Put all of one stack in a greased mini loaf pan, then put all of the other stack in another greased mini loaf pan.
  9. Bake at 350 degrees for 25 to 30 minutes - until a deep golden brown.
  10. Cool in the pan for about 30 minutes.
  11. Using a butter knife, loosen the bread from the pan and carefully remove.