Friday, July 31, 2015

July Garden Update - 5 Favorites!

Happy last day of July you guys!!!
This month's garden update is extra special,
because it's a Five Friday Favorites post too!

Yup, a two for one on this fine Friday.

And like my usual Five Friday Favorite posts,
I'm linking up with THREE different groups.
Make sure to check them all out at the bottom of this post!

If you're new to the blog,
my garden is kinda what got this thing going,
but my cooking has sorta taken over for the most part.

A few months ago I made a point to post about my garden more.
And I even started a monthly garden update the last day of every month!
If you missed them, check out: March, April, May and June.

Ok - now onto the Five Friday Favorites Update!

Jalapeno Plant
When I posted last month's update,
I said I hadn't seen any buds or blooms recently.
Well wouldn't you know - I have a few of each now!!!
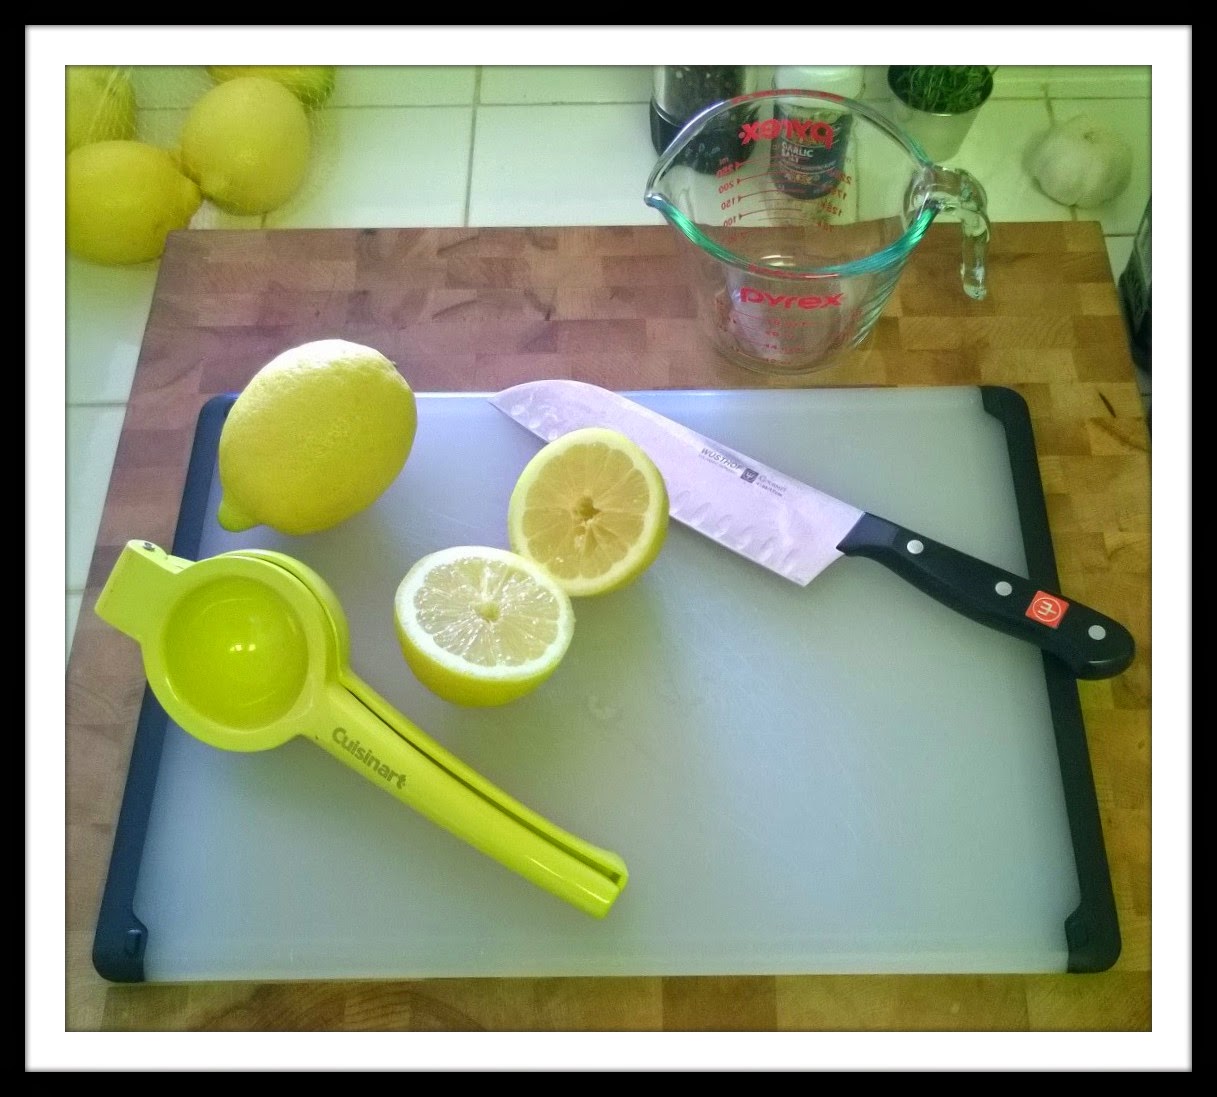
Lemon Tree
Last month I pruned the heck outta my Lemon Tree!
It it still looking pretty bare, but seems to be doing quite well.
I want more leaves already, but I know that will take some time.

Herb Garden

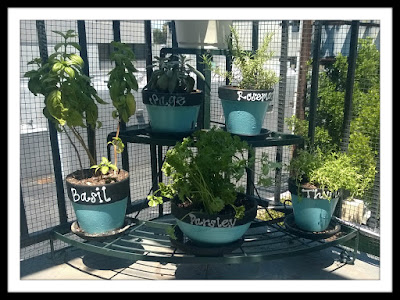
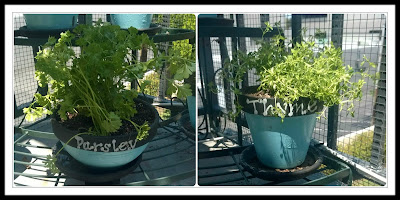
I recently added two new plants to the herb garden.
I hadn't had parsley for quite some time,
and I replaced the dying thyme plant I did have.

Coconut Liners
(Photo Source)
I haven't had liners in my window boxes for months!!!
In fact, I STILL don't, but I have new liners and that's the first step.
I'm hoping to have new flowers planted very soon!

Christmas Tree
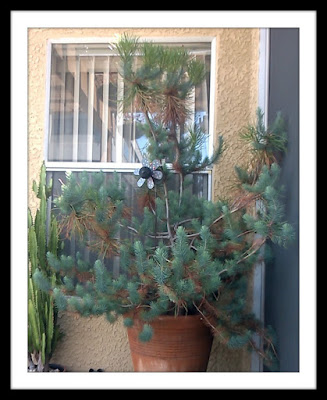
Now that we're less than FIVE months from Christmas,
it's time for me to start thinking about the holidays
(I'm only partly joking folks...)
And I can't wait to decorate this monster again in a few months.

Now for more Friday Link Up Fun, check out the blogs below!

Andrea and Erika's blogs from Friday Favorites.

April's blog from 5 on Friday.

Karli and Amy's blogs from oh hey friday!

And lastly, as a quick reminder -
I will be blogging about garden updates 
every last day of each month.

It may not be a complete update each month,
but it will be about something in the garden.

So keep coming back to see what I have growing!

Tuesday, July 28, 2015

Things I'm Lovin' Tuesday: Rosalynne Love Handlettering

A few weekends ago I was blog brainstorming,
and I came up with an idea for a NEW series for this blog.
I love sharing foods I make, DIY projects I do and my garden updates,
but I thought it'd be fun to add a monthly post about what I'm currently loving.

So starting today,
and happening every last Tuesday of the month,
I will posting a new blog as part of
THINGS I'M LOVIN' TUESDAY!!!

It may be a new food I can't get enough of, 
it may be a new cleaning product that is amazing,
it may be a new fun beauty trend I just have to share,
or it may be something completely random and out of the blue!

Since today is the very first post for the series,
I thought I'd go with something completely random,
and share a great Etsy shop with you guys,
owned by someone I've known almost her WHOLE LIFE!


I've known about Rosalynne Love for awhile,
but it wasn't until recently that I made my first purchase.
And man, I wish I hadn't waited so long to place an order!
These designs are so darling and Rosalynne is such a doll.

Like I mentioned above, I've known Rosalynne for years!
She was just a little baby when I met her, but I too was a lot younger.
Not only was her dad the pastor of the church I grew up in,
but I spent years "babysitting" her and her two siblings.

I sadly haven't seen her in quite a few years,
but am so proud of the lady she's become
and what she's doing with her life today.
And that's one of the reasons I had to share her shop today!

Take a look below at the fun things I recently got from Rosalynne Love.

Aren't these just so cute???

I knew I wanted this design immediately.

And of course this one because it's my favorite bible verse!

And how could I forget this one?

Not only are her designs really cute,
but the quality of the shirts are great too!
The writing on the sparkle one above even sparkles!
I mean really - how cool is that??? 

Now head on over to Rosalynne Love
and order yourself some of her cute shirts!
Oh and maybe throw in a tote bag
or even a moleskin notebook while you're at it!

Don't forget to check back the last Tuesday in August,
and every month for that matter,
so you can read all about that month's 
THINGS I'M LOVIN' TUESDAY!!!

Sunday, July 26, 2015

Dad's Lemon Pepper Chicken

My dad has made Lemon Pepper Chicken for years.
I can't remember a birthday growing up,
that I didn't request for him to make it for dinner!

After I moved away and started to cook more variety,
I asked him for the recipe and only slightly modified it!
Keep reading to see how this tasty chicken is made.

The Goods:
Chicken
Lemon Juice
Olive Oil
Worcestershire Sauce
Fresh Pepper
Garlic
Garlic Salt
Salt
Fresh Thyme

Squeeze your lemons to get fresh lemon juice.

I recently got a lemon squeezer and don't know how I lived without.
It makes getting fresh lemon, lime or even orange juice so easy! 

It took me three lemons to get 1/2 cup of juice.

Add everything except the chicken to the juice.
And then mix until everything is incorporated.

You can use whatever chicken you'd like.
Boneless, bone in - it really doesn't matter.
I've had it on all, but I prefer boneless breasts.

Add a little bit of marinade to a container with a lid,
add your chicken and then the rest of the marinade.
Secure lid tightly and marinate a few hours or overnight.


Grill your chicken until cooked fully.

Then serve with a yummy side or two and enjoy!!!

And if possible - dine outside with a yummy cocktail!


Dad's Lemon Pepper Chicken 

About 1 Pound Chicken
1/2 Cup Fresh Lemon Juice
2 Tablespoons Olive Oil
1 Teaspoon Worcestershire Sauce
2 Cloves Garlic - minced
1/2 Teaspoon Fresh Ground Pepper
1/2 Teaspoon Garlic Salt
1/4 Teaspoon Salt
1 Teaspoon Fresh Thyme

  1. Juice lemons until you have 1/2 a cup of juice.
  2. Add everything else, except the chicken, and combine well.
  3. Put marinade and chicken in a container with a lid.
  4. Refrigerate for at least a few hours, or overnight.
  5. Grill until chicken is cooked fully.
  6. Serve and enjoy!!

Tuesday, July 21, 2015

Home Tour Link Up!

Last December, a fellow blogger came up with an idea I loved!
which happens two Tuesdays every single month!

I knew I wouldn't be participating in every single one,
or even every month for that matter,
but a few struck my fancy and I marked them in my planner!

I take pride in keeping a nice, clean home,
and am always thinking of ways to redo or redecorate something.
So you bet I was excited for today's Show and Tell:
HOME TOURS!!!

While I don't currently live in a house,
I have worked hard to make my apartment a "home"
and I'm excited to share it with you guys today!

Come on in!
I almost always have a some sort of seasonal decor outside my front door.
And if it's a wreath, you can bet I made it myself!


Two different views of the front door from inside.

While I do wish I had a more updated kitchen, as a renter I can't be too picky.
I do love how open it is though, because it makes entertaining so much easier!

I also love the open living/dining room with vaulted ceilings.
Confession - my living room already looks a tad bit different. 
I made some small changes, but I didn't have time to snap new pictures!

A few more shots of the dining and living room from different areas of my apartment.

Head down the hall and the guest bath is the first door to the left.
Having an extra bathroom is a must with any type of company!

The rest of the hallway from a few different directions.

Continue down the hall and the second door to the left is the den.
Also known as the guest room when I have family in town visiting.

And at the end of the hall you finally reach my bedroom!
And guess what? These pictures aren't 100% accurate either
because I've made a few small changes in here too.
I told you at the beginning of the post - I'm always redecorating!

More views of the bedroom.

And yet even MORE views of the bedroom!
I lost a walk in closet when I moved into this place,
but the wall of closets has proved to be pretty amazing too!

Lastly, the master bath that is connected to my bedroom.

I hope you've enjoyed the virtual tour of my little home in Los Angeles!

Friday, July 17, 2015

Quinoa Pizza Bites

I was hooked on bite sized quinoa foods
and was on the lookout for even more!

So when I came across a recipe for Quinoa Pizza Bites,
I was not only excited but also became super hungry.
I couldn't wait to make them to eat and share with you guys!

If you thought the Broccoli Cheddar ones were simple to make,
you'll be happy to know that these are just as easy,
if not even easier to make!!

Keep reading and I'll show ya how! 

The Goods:
Cooked Quinoa
Mozzarella
Pepperoni
Eggs
Onion
Garlic
Paprika
Seasoning Salt
Oregano
Fresh Basil
Marinara Sauce

In a large mixing bowl, add all ingredients except for marinara sauce.

Mix everything up so it's well incorporated.

Distribute mixture into greased mini muffin pans, filling completely.
Press mixture down with hands to compact.

Bake at 350 degrees for 15 to 20 minutes,
until tops are crisp and a little golden in color.

Remove from muffin pans and serve with warmed marinara sauce.

Dip a pizza bite into the sauce and enjoy!

And because they're so tiny, go ahead and have another!!!

Quinoa Pizza Bites
Adapted from Miss Be Fit's Recipe

2 Cups Cooked Quinoa
2 Large Eggs
3/4 Cup Cooked Quinoa
1 Cup Shredded Mozzarella Cheese
2 Cloves Garlic, Minced
1/2 Cup Fresh Basil, Chopped
4 Ounces Pepperoni Slices, Chopped
1/2 Teaspoon Seasoning Salt
1 Teaspoon Paprika
1 Teaspoon Dried Oregano
Marinara Sauce for Dipping
  1. Preheat oven to 350 degrees, grease two mini muffin pans and set aside.
  2. In a large mixing bowl, add all ingredients except for marinara sauce.
  3. Mix everything up so it's well incorporated.
  4. Distribute mixture into greased mini muffin pans, filling completely.
  5. Press mixture down with hands to compact.
  6. Bake at 350 degrees for 15 to 20 minutes - until tops are crisp and a little golden in color.
  7. Remove from muffin pans and serve with warmed marinara sauce.

Wednesday, July 15, 2015

Bubble Bath Review: Avon Bubble Delight Bubble Bath

 This is a non-sponsored review and I purchased (or received as a gift) my own Bubble Bath.

It's the third Wednesday of the month, so you know what that means folks?
If you guessed another bubble bath review...then you're absolutely right!!!
You can read my past bubble bath reviews hereherehere and here!

As I mentioned the last few months
(I hope I don't sound like a broken record...)
If you have any bubble baths you love,
I'd love your suggestions so send 'em my way!!

My mom has been ordering Avon for YEARS.
She even had the same Avon lady almost my whole life,
and I can't remember her using anything except Avon Bubble Bath.

We live in different states now,
but when my mom's about to put an Avon order in,
she almost always ask me: "Are you low on bubble bath?"
Aren't moms the best???

When I started doing this little Bubble Bath Review series,
I had no doubt that I'd be doing an Avon Bubble Bath one too.
SPOILER - I'm absolutely a fan of this bubble bath!!!

Over the years I'm sure I've tried EVERY Avon Bubble Bath,
but I've learned that I do have a couple favorites!
are two scents that I almost always have on hand.

Vanilla Cream won out for this night's bubble bath!

Like the last few month's,
this bubble bath is a no-brainer once again!

Simply pour the bubble bath into running water...

Then sit back, relax and enjoy all the bubbles!
I went a lil crazy with the bubble this time, but oh well.

Oh and of course make sure you have the essentials:
something to drink, something to read, your phone and candles!
In my opinion - bubble baths are much better with a candle or two.

I know I already let the cat out of the bag,
but there is no doubt that I'm a fan of Avon Bubble Bath,
I've loved it since I was young,
and I foresee myself loving it for years to come too.


Sunday, July 12, 2015

DIY: Homemade Slime

but I didn't really include step-by-step instructions,
so I figured it was only right to do it again!

And I figured with Summer vacation in full swing,
now would be a great time to post about this fun project.
It'd make a cool activity to do with some youngin' with free time.

The Goods:
Borax
Glue
Water
Food Coloring

Combine the borax with water and mix it up.

Add the glue to a large mixing bowl.

Then add water...

Some food coloring...

And mix it up until everything is incorporated.

Add the water/borax mixture to the glue/water mixture...

And then start to stir with a spoon.

Once it starts to combine...

Ditch the spoon and mix using your hand.
Remove excess water and kneed until no longer sticky.


Not the fun part - play with the slime!!!

I had to test it to make sure it was a good batch!
Or I just wanted to pay with it...

Store in an airtight container.

Homemade Slime Recipe can be found HERE!